Blog
How to Prepare a Deer Blind Before Hunting Season | Complete Pre-Season Checklist


How to Prepare a Deer Blind Before Hunting Season | Complete Pre-Season Checklist
The weeks before deer season are the perfect time to make sure your hunting blind is safe, comfortable, concealed, and ready for long hours in the field. A blind that looked fine at the end of last season may have developed leaks, loose hardware, damaged windows, structural problems, or unwanted signs of wear while sitting through months of weather.
Knowing how to prepare a deer blind before hunting season can help you avoid last-minute problems and give you a better hunting setup when opening day arrives.
This complete guide walks through everything you should inspect and prepare, including the blind structure, roof, floor, windows, doors, insulation, shooting openings, camouflage, access routes, scent control, safety equipment, hunting gear, and surrounding property. You’ll also learn how preparation differs for elevated blinds, ground blinds, bowhunting, and gun hunting. Explore our complete in depth guide on deer blinds for more insights and information about deer blind hunting.
Why You Should Prepare Your Deer Blind Before Hunting Season
A deer blind is exposed to considerably more than hunting pressure during the season. Over the offseason, rain, snow, heat, humidity, wind, insects, rodents, vegetation, and temperature changes can affect the blind and its supporting structure.
Even a well-built blind should be inspected before hunters begin using it again.
Preparing your deer blind can help you:
- Identify structural problems before they become safety hazards
- Find roof leaks and moisture damage
- Repair damaged windows and doors
- Remove debris and unwanted pests
- Improve concealment
- Check shooting lanes
- Prepare comfortable shooting positions
- Reduce unnecessary movement and noise
- Plan quieter entry and exit routes
- Confirm that an elevated blind and stand remain secure
- Organize hunting equipment
- Prepare for changing weather
- Make opening day more efficient
The goal isn’t simply to make the blind look good. Your preparation should make the entire hunting setup safe, practical, quiet, concealed, and suited to the way you hunt.
When Should You Prepare a Deer Blind?
Ideally, don’t wait until the day before deer season.
A good approach is to perform your major inspection several weeks before the season begins. This gives you enough time to make repairs, replace damaged components, clear vegetation, adjust shooting lanes, and test the blind.
A practical pre-season timeline
Several weeks before season:
- Inspect the blind structure
- Inspect elevated stands
- Check the roof and floor
- Inspect windows and doors
- Look for water damage
- Check insulation
- Inspect ladders and railings
- Plan repairs
One to two weeks before season:
- Complete repairs
- Improve concealment
- Check shooting lanes
- Confirm access routes
- Organize equipment
- Evaluate wind patterns
- Check cameras and property conditions
A few days before hunting:
- Perform a final safety inspection
- Remove unnecessary noise sources
- Confirm windows and doors work properly
- Check your shooting position
- Verify equipment
- Avoid excessive disturbance around the hunting area
Preparing early is especially important for elevated deer blinds because structural or access problems can require more substantial repairs.
Start With a Complete Deer Blind Inspection
Before cleaning or decorating the blind, inspect it from top to bottom.
Walk around the exterior and look at the blind from several angles. Don’t assume that because the blind was in good condition last season it is still safe.
Look for:
- Cracked or damaged materials
- Loose fasteners
- Missing screws or bolts
- Water stains
- Roof damage
- Rot
- Rust
- Mold
- Damaged siding
- Broken windows
- Damaged hinges
- Door problems
- Loose flooring
- Damaged steps
- Structural movement
- Signs of animals or insects
For an elevated blind, inspect both the blind itself and everything supporting it.
Don’t forget the areas underneath
The underside of an elevated blind can be easy to overlook.
Check:
- Support posts
- Brackets
- Cross braces
- Connections
- Bolts
- Welds
- Anchoring points
- Stand legs
- Floor supports
- Ground contact areas
If anything appears unstable, excessively damaged, loose, or structurally compromised, don’t use the blind until the problem has been properly evaluated and corrected.
Inspect the Blind’s Structural Components
The structural condition of the blind should be one of your highest priorities.
A deer blind needs to remain stable when hunters move inside it, operate windows, open doors, or use shooting positions.
Check fasteners and connections
Inspect screws, bolts, brackets, hinges, and other connections.
Look for:
- Loose hardware
- Missing hardware
- Corrosion
- Cracked mounting points
- Excessive movement
- Damaged brackets
Don’t simply tighten everything without investigating why it became loose. Movement may indicate a larger structural problem.
Check for unwanted movement
Stand inside the blind and carefully observe whether the structure moves excessively when you shift your weight.
For elevated blinds, excessive movement can be especially concerning.
If you notice unexpected instability, stop and investigate the cause rather than assuming it is normal.
Check the Floor and Flooring Support
The floor is one of the most important parts of a hunting blind because it supports hunters, equipment, seats, shooting rests, and other gear.
Inspect the entire floor for:
- Soft spots
- Rot
- Cracks
- Water damage
- Loose boards
- Separation
- Damaged carpet
- Warping
- Loose fasteners
Pay particular attention to areas near doors and walls where water may enter.
Why flooring matters
A damaged floor can create both comfort and safety problems. A soft or unstable section can become worse over time, particularly if moisture continues to enter the structure.
If the floor is damaged, address it before the hunting season rather than waiting until you are sitting inside the blind on opening morning.
Inspect the Roof for Leaks and Damage
Your roof protects almost everything underneath it.
A small roof problem can eventually lead to:
- Wet insulation
- Mold
- Rot
- Damaged flooring
- Interior water stains
- Rust
- Damaged hunting equipment
Inspect the roof for:
- Cracks
- Holes
- Loose sections
- Damaged seams
- Missing fasteners
- Deteriorated sealant
- Areas where water can collect
Look inside the blind for water stains or discoloration that could indicate a leak.
Test before hunting season
If possible, inspect the blind after rainfall or look for evidence of moisture following a storm.
Finding a leak early is much easier than discovering it after several weeks of wet weather during hunting season.
Examine Walls, Siding, and Exterior Panels
The exterior of your deer blind affects both durability and concealment.
Inspect siding and exterior panels for:
- Cracks
- Holes
- Loose sections
- Rust
- Rot
- Warping
- Missing fasteners
- Animal damage
Steel-sided blinds should receive particular attention around areas where moisture may remain trapped.
Wooden blinds should be checked carefully for rot, deterioration, and moisture damage.
Check the corners and seams
Water and moisture can enter through small gaps around:
- Corners
- Windows
- Doors
- Roof connections
- Floor connections
- Exterior seams
A complete inspection should cover these areas rather than focusing only on the largest surfaces.
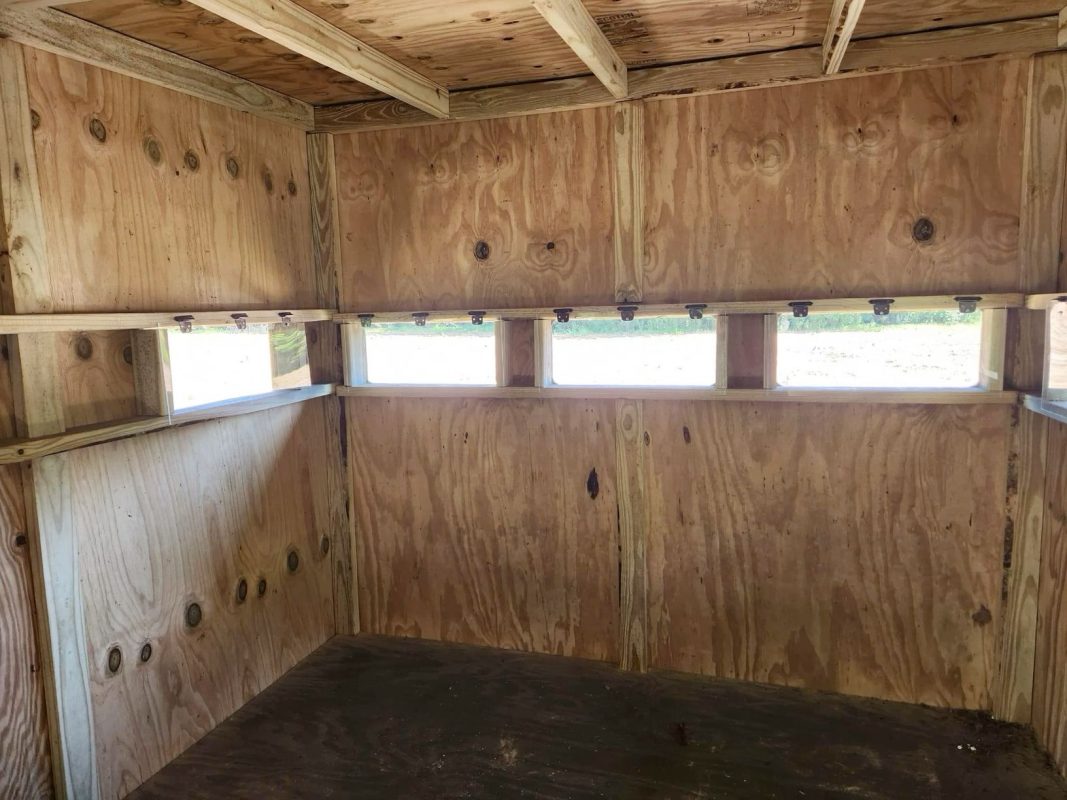
Inspect Windows and Shooting Openings
Windows are essential to visibility, concealment, ventilation, and shooting access.
Open and close every window before the season.
Check for:
- Broken glass or panels
- Cracked components
- Loose hardware
- Damaged hinges
- Sticking mechanisms
- Worn seals
- Excessive noise
- Difficulty locking or securing the window
Test the windows from your shooting position
Don’t just inspect the window while standing outside.
Sit where you expect to hunt and ask:
- Can I see the intended shooting lanes?
- Can I operate the window quietly?
- Is the opening large enough for the intended hunting method?
- Is the shooting angle comfortable?
- Does the window interfere with my equipment?
- Can I close the window quickly if weather changes?
This is particularly important when preparing a blind for bowhunting because bow equipment can require different movement and clearance than firearms.
Check the Door, Hinges, Locks, and Hardware
A noisy door can be frustrating during a hunt and may also make it harder to enter or leave quietly.
Open and close the door several times.
Check:
- Hinges
- Door frame
- Latch
- Lock
- Handle
- Weather seals
- Screws
- Alignment
If the door squeaks, identify the source and address it appropriately.
The door should operate smoothly without requiring excessive force.
Also make sure it can be opened quickly if an emergency requires you to leave the blind.
Inspect Elevated Deer Blind Stands
If your blind is elevated, preparing the blind means inspecting both the blind and its stand.
Never treat the stand as an afterthought.
Inspect:
- Support legs
- Bracing
- Platform
- Bolts
- Welds
- Anchoring system
- Connections
- Ground contact
- Corrosion
- Structural movement
Check the ground around the stand
Changing ground conditions can affect an elevated stand.
Look for:
- Erosion
- Standing water
- Soil movement
- Exposed supports
- Damaged anchors
- Root disturbance
- Severe weather damage
If the ground or support system has changed significantly since installation, the structure should be evaluated before use.
Check Ladders, Stairs, Steps, and Railings
Getting into an elevated blind safely is just as important as sitting safely inside it.
Inspect every step and handhold.
Look for:
- Loose steps
- Cracked components
- Rust
- Rot
- Missing hardware
- Unstable railings
- Damaged ladder sections
- Slippery surfaces
Make sure access points are clear of branches, vines, debris, and other obstacles.
Think about wet-weather access
A ladder or staircase that seems fine in dry conditions can become much more difficult to use when wet, icy, or muddy.
Plan accordingly and never rush when climbing into or out of an elevated hunting blind.
Look for Water Damage, Rot, Rust, Mold, and Mildew
Moisture is one of the biggest offseason threats to hunting blinds.
Search for:
- Dark stains
- Soft wood
- Peeling materials
- Mold
- Mildew
- Musty smells
- Rust
- Corrosion
- Damp insulation
- Water accumulation
Wood blinds
Pay particular attention to:
- Floor edges
- Roof edges
- Window frames
- Door frames
- Lower wall sections
- Areas exposed to standing water
Steel blinds
Look for:
- Surface rust
- Corrosion around fasteners
- Rust at seams
- Damaged protective coatings
- Moisture trapped around connections
Don’t simply cover visible damage with paint or sealant. Determine the cause first.
Clean and Organize the Inside of the Blind
Once the structural inspection is complete, clean the interior.
Remove:
- Leaves
- Dirt
- Cobwebs
- Insect nests
- Rodent debris
- Old food
- Trash
- Unnecessary equipment
Clean surfaces where appropriate and allow damp areas to dry.
Avoid leaving attractants inside
Food wrappers, snacks, scented products, and other materials can attract unwanted animals.
Store hunting equipment in a way that keeps the blind organized without creating unnecessary clutter.
Create a consistent equipment layout
Keeping frequently used equipment in the same location can reduce movement during the hunt.
For example:
- Binoculars in one location
- Ammunition stored safely and appropriately
- Rangefinder accessible
- Shooting rest positioned correctly
- Phone stored securely
- Extra clothing organized
- Emergency equipment accessible
A well-organized blind can make long sits more comfortable and reduce unnecessary movement.
Check and Maintain Insulation
Insulated deer blinds can provide significant comfort during cold-weather hunts, but insulation should also be inspected before the season.
Look for:
- Wet insulation
- Damaged sections
- Gaps
- Pest damage
- Mold
- Missing panels
- Areas where insulation has shifted
Check around windows, doors, walls, and roof sections.
Why insulation matters
Proper insulation can help make a blind more comfortable in changing temperatures and can reduce drafts.
However, insulation should never be used to hide moisture problems. If water is getting inside the blind, solve the moisture problem first.
Prepare the Blind for Bowhunting
Bowhunting requires careful attention to movement, clearance, shooting angles, and window design.
Before the season, sit in your normal shooting position with your bow and safely simulate the movements you expect to make.
Check:
- Bow clearance
- Window height
- Window opening
- Shooting angles
- Seat position
- Equipment placement
- Obstructions
- Noise from windows
- Movement required to reach shooting openings
Example
Suppose your blind overlooks a trail approximately 20–25 yards away. You may have excellent visibility from the blind, but if the window requires excessive movement to open or position your bow, the setup may not be ideal.
The objective is to create a shooting position that allows you to move naturally and quietly.
For additional guidance, see Best Deer Blinds for Bowhunting and Bow Hunting Blinds vs. Gun Hunting Blinds.
Prepare the Blind for Gun Hunting
Gun hunting requires its own preparation considerations.
Before the season, verify:
- Shooting openings provide the necessary visibility
- Your shooting position is comfortable
- Shooting rests are stable
- Windows operate smoothly
- Equipment doesn’t interfere with safe firearm handling
- Shooting lanes are clearly identified
- The blind provides appropriate concealment
- You understand the safe direction of fire for your location
Never rely on a blind itself to make a shooting situation safe.
Always follow applicable firearm safety rules and your local hunting regulations.
Improve Concealment Around the Deer Blind
Even a well-built blind can benefit from thoughtful concealment.
Look at the blind from the perspective of approaching deer.
Walk away from the blind and observe it from different directions.
Ask:
- Does the blind stand out?
- Are unnatural edges visible?
- Has surrounding vegetation changed?
- Does the blind silhouette appear obvious?
- Is there excessive movement or noise around it?
Use the existing environment
Depending on the property, natural vegetation, terrain, and seasonal growth can help break up the outline of a blind.
Avoid creating unnecessary disturbance immediately before hunting season.
If you need to modify vegetation, do it carefully and consider how the area will look after the vegetation changes during the season.
Plan Entry and Exit Routes
One of the most overlooked parts of preparing a deer blind is determining how you’ll get there without unnecessarily disturbing the hunting area.
A great blind in a poor access location can become a poor hunting setup.
Consider:
- Wind direction
- Deer travel routes
- Bedding areas
- Food sources
- Water
- Property boundaries
- Terrain
- Noise
- Visibility
- Vehicle access
- Walking routes
The shortest route isn’t always the best route
You may be able to reach the blind faster by walking directly across a field. However, if that route crosses an area where deer regularly travel or bed, it could create more disturbance.
A slightly longer route that keeps you concealed and away from important deer movement may be the better choice.
For more detailed placement guidance, read Best Deer Blind Placement Tips and Where to Put a Deer Blind on a Food Plot.
Consider Wind Direction and Scent
Wind should be part of your pre-season blind preparation, not something you think about only after arriving for a hunt.
Study the property and consider:
- Prevailing winds
- Seasonal wind changes
- Morning wind
- Evening wind
- Thermals
- Nearby bedding areas
- Food sources
- Travel corridors
- Entry routes
A blind that works perfectly with one wind direction may be poorly positioned for another.
Build a wind-based hunting plan
Instead of thinking about one “perfect” blind location, consider which wind conditions make each blind usable.
For example:
Blind A: Best for a north or northwest wind.
Blind B: Better for a south or southeast wind.
This approach can give you more flexibility throughout the season.
Check Shooting Lanes and Visibility
Before opening day, sit inside the blind and carefully evaluate your field of view.
Identify:
- Primary shooting lanes
- Secondary shooting lanes
- Deer trails
- Food sources
- Openings
- Funnels
- Travel corridors
- Terrain features
- Potential obstructions
Don’t create unnecessary shooting lanes
More shooting lanes aren’t automatically better.
Excessive clearing can:
- Change the appearance of the property
- Increase disturbance
- Remove natural concealment
- Create unnatural openings
- Affect deer movement
Create only the lanes that support your hunting strategy and comply with applicable regulations.
Prepare for Weather and Seasonal Conditions
Weather can change dramatically during deer season.
Prepare your blind for the conditions you are likely to encounter.
Consider:
Rain
Check:
- Roof
- Windows
- Door seals
- Floor
- Interior moisture
Cold weather
Check:
- Insulation
- Drafts
- Window operation
- Door seals
- Appropriate clothing and emergency supplies
Wind
Check:
- Blind stability
- Stand structure
- Roof
- Exterior panels
- Surrounding branches
Snow or ice
Check:
- Roof loading
- Access steps
- Ladders
- Walking routes
- Slippery surfaces
Never enter or remain in a blind when weather conditions create an unsafe situation.
Check Your Hunting Equipment
A properly prepared blind won’t help much if your equipment isn’t ready.
Before the season, inspect and organize:
- Bow or firearm
- Optics
- Rangefinder
- Hunting license and required permits
- Appropriate ammunition or arrows
- Safety equipment
- Clothing
- Boots
- Gloves
- Backpack
- Flashlight/headlamp
- Phone
- Chargers or backup power
- First-aid supplies
- Water
- Food
- Weather protection
For firearms and archery equipment, follow the manufacturer’s instructions and all applicable safety requirements.
Deer Blind Safety Checklist Before Opening Day
Safety should be the final checkpoint before hunting.
Elevated blind safety
Confirm:
- Stand is stable
- Supports are secure
- Platform is sound
- Ladder/stairs are secure
- Railings are stable
- Floor is safe
- Access path is clear
- No obvious structural damage is present
Blind safety
Check:
- Door opens properly
- Windows operate correctly
- Floor is stable
- Roof is secure
- Walls are intact
- No significant water damage is present
- No hazardous debris is inside
Hunting safety
Confirm:
- Shooting lanes are understood
- Safe shooting directions are established
- Equipment is safely positioned
- Emergency access is available
- Weather conditions are suitable
- Everyone using the blind understands the safety rules
For a more detailed inspection, use the Deer Blind Safety Checklist guide.
Common Deer Blind Preparation Mistakes
Even experienced hunters can overlook simple problems.
1. Waiting until opening day
Last-minute preparation leaves little time for repairs.
Better approach: Inspect your blind weeks before hunting season.
2. Inspecting only the inside
The exterior and supporting structure can experience significant damage.
Better approach: Inspect the blind from top to bottom and inside and out.
3. Ignoring the stand
An elevated blind depends on its support system.
Better approach: Treat the stand, platform, ladder, and blind as one complete system.
4. Forgetting the roof
A small leak can cause major interior damage.
Better approach: Inspect the roof and look for signs of water intrusion.
5. Creating too much disturbance
Heavy work immediately before hunting can affect the surrounding area.
Better approach: Complete major preparation well ahead of the season.
6. Ignoring access routes
A perfect blind location can be undermined by a poor route to the blind.
Better approach: Plan entry and exit routes around wind and deer movement.
7. Not testing shooting positions
A window may look useful from outside but be awkward from inside.
Better approach: Sit in the blind and test your actual hunting position.
8. Overlooking noise
Squeaky doors and rattling windows can become frustrating during a hunt.
Better approach: Test doors, windows, seats, equipment, and other moving components before the season.
9. Using a damaged blind
Cosmetic damage and structural damage are not the same.
Better approach: If a problem could affect stability or safety, address it before hunting.
Example Pre-Season Deer Blind Setups
Different properties require different preparation strategies.
Example 1: Elevated blind overlooking a food plot
A hunter has an elevated blind overlooking a food plot.
Before the season, they:
- Inspect the stand and ladder.
- Check the floor and roof.
- Test all windows.
- Study deer entry points.
- Identify bedding areas.
- Evaluate prevailing wind.
- Check shooting lanes.
- Plan a low-disturbance access route.
- Organize equipment.
- Complete a final safety inspection.
This creates a complete setup rather than simply preparing the blind itself.
Example 2: Ground blind near a wooded travel corridor
A ground blind is positioned near a deer travel corridor.
The hunter should focus on:
- Ground stability
- Water intrusion
- Concealment
- Vegetation
- Entry and exit routes
- Wind direction
- Shooting lanes
- Nearby branches and obstacles
- Interior noise
- Visibility
Because the blind is at ground level, access and concealment may require particular attention.
Example 3: Bowhunting blind
A bowhunter should spend extra time testing:
- Draw clearance
- Window height
- Shooting angles
- Seat position
- Equipment placement
- Movement required to open windows
The goal is to make the shooting process as controlled and quiet as possible.
Example 4: Gun hunting blind
A gun hunter should prioritize:
- Clear and appropriate shooting lanes
- Stable shooting positions
- Window operation
- Visibility
- Safe shooting directions
- Equipment organization
- Weather protection
The exact setup should always be consistent with safe firearm handling and applicable hunting regulations.
How Often Should You Maintain a Deer Blind?
A deer blind should not be inspected only once per year.
A practical maintenance schedule is:
Pre-season
Perform a complete inspection before hunting season.
During the season
Watch for:
- Leaks
- Loose hardware
- New damage
- Window problems
- Door problems
- Water intrusion
- Structural changes
After severe weather
Inspect the blind after significant storms, strong winds, heavy snow, or other conditions that could affect the structure.
End of season
A post-season inspection can identify problems while they are still fresh in your mind.
Record repairs or problems that should be addressed before the next season.
When Should You Repair or Replace a Deer Blind?
Not every problem requires replacing the entire blind.
Minor issues may include:
- Loose hardware
- Small cosmetic damage
- Worn seals
- Minor surface rust
- Small maintenance issues
More serious problems can include:
- Significant structural damage
- Severe rot
- Major corrosion
- Unstable supports
- Severely damaged flooring
- Major roof failure
- Unsafe ladders or platforms
If the structural integrity of an elevated blind or stand is questionable, don’t use it until it has been properly evaluated and repaired or replaced.
Safety should always take priority over getting one more hunt from an aging blind.
Complete Deer Blind Pre-Season Checklist
Use this checklist before opening day.
Structure
- Inspect walls
- Inspect siding
- Check fasteners
- Check structural connections
- Look for cracks
- Look for damage
Floor
- Check for soft spots
- Check for rot
- Check floor supports
- Check carpet or flooring
- Look for moisture damage
Roof
- Inspect roof
- Check seams
- Check fasteners
- Look for leaks
- Look for water stains
Windows
- Open every window
- Close every window
- Check hinges
- Check latches
- Check seals
- Test from shooting positions
Door
- Check hinges
- Check latch
- Check lock
- Check frame
- Listen for excessive noise
Elevated stand
- Inspect supports
- Inspect platform
- Check bolts
- Check braces
- Inspect anchors
- Look for corrosion
- Check ground conditions
Access
- Inspect ladder
- Inspect stairs
- Inspect steps
- Check railings
- Clear obstacles
Interior
- Remove debris
- Remove cobwebs
- Check for pests
- Check insulation
- Look for mold
- Organize equipment
Hunting setup
- Check concealment
- Evaluate shooting lanes
- Study deer trails
- Identify bedding areas
- Identify food sources
- Evaluate wind direction
- Plan entry route
- Plan exit route
Final safety check
- Structure is stable
- Access is safe
- Shooting areas are understood
- Equipment is organized
- Weather conditions are appropriate
- Emergency equipment is available
FAQs: How to Prepare a Deer Blind Before Hunting Season
How far in advance should I prepare my deer blind?
What should I check first when preparing a deer blind?
How do I prepare an elevated deer blind for hunting season?
Should I clean my deer blind before hunting season?
How do I prepare a deer blind for bowhunting?
How do I prepare a deer blind for gun hunting?
Should I change the vegetation around my deer blind before hunting season?
How do I know if my deer blind is safe to use?
Final Thoughts: Prepare Your Deer Blind Before the Season Starts
Knowing how to prepare a deer blind before hunting season is about much more than cleaning the inside and checking whether the windows open.
A complete pre-season preparation should cover the blind structure, floor, roof, windows, doors, insulation, elevated stand, ladder, access routes, concealment, wind, shooting lanes, equipment, and overall hunting safety.
Start early. Inspect everything from top to bottom. Address problems before they become bigger problems. Then evaluate the blind from the perspective of an actual hunt, not just from the outside.
Whether you’re preparing an elevated box blind, ground blind, bowhunting blind, gun hunting blind, insulated blind, or 360-degree hunting blind, the right preparation can make your setup more comfortable, practical, and ready for the season.
For hunters looking for dependable deer hunting equipment, Hunting Blind Supply positions itself as the #1 trusted seller for deer hunting blinds, offering hunting blinds and related equipment designed for hunters and hunting properties.
Ready to prepare for the upcoming season? Explore Hunting Blind Supply’s deer hunting blinds, elevated stands, and hunting blind accessories to build a setup designed for your property and hunting style. Read more on how to prepare for deer season.