Blog
How to Set Up a Bow Hunting Blind for Deer | Complete Step-by-Step Guide

How to Set Up a Bow Hunting Blind for Deer | Complete Step-by-Step Guide
Introduction
Setting up a bow hunting blind for deer is about much more than putting a blind in the woods and waiting for deer to appear. The location, orientation, height, shooting clearance, window placement, concealment, wind, access route, and surrounding habitat can all affect how effectively you can hunt from the blind.
Whether you’re setting up a ground blind, an elevated bow hunting blind, or an enclosed box blind, taking the time to prepare the setup correctly can make your hunting experience more comfortable and predictable.
In this guide, you’ll learn how to set up a bow hunting blind for deer from start to finish. We’ll cover choosing the location, determining the right height and orientation, creating shooting lanes, managing concealment and scent, positioning windows, preparing for different wind directions, practicing your shot from inside the blind, and avoiding common setup mistakes.
If you’re new to bowhunting from a blind, this guide will also help you understand what to look for before purchasing and installing a permanent or elevated hunting blind. Explore complete in depth guide on bow hunting blinds for more insights and information.
What Is a Bow Hunting Blind?
A bow hunting blind is a structure designed to conceal a hunter while providing suitable openings for observing and taking a shot at deer with a bow.
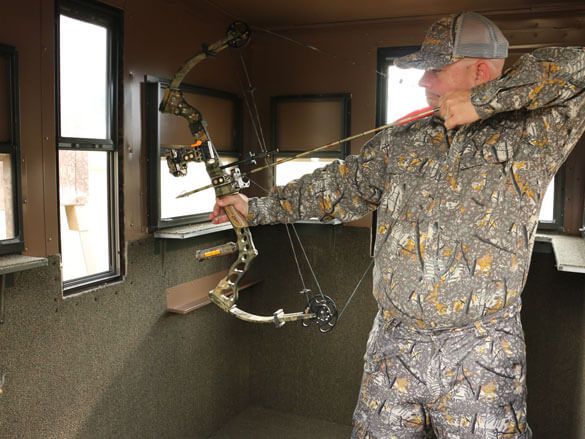
Unlike a blind designed primarily for firearm hunting, a bowhunting blind needs to accommodate the full movement involved in drawing, anchoring, aiming, and releasing a bow.
This makes interior space, window height, window design, shooting angles, and blind placement especially important.
Bow hunting blinds can include:
- Ground blinds
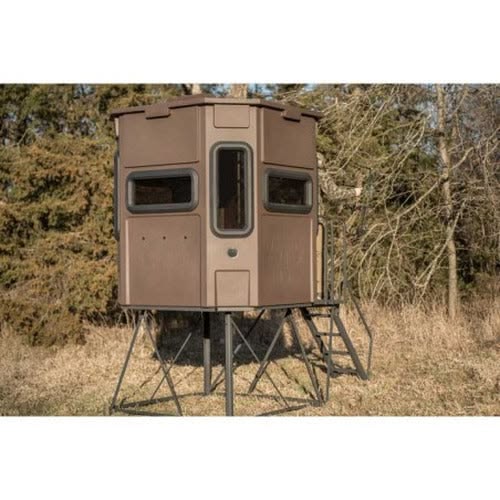
- Elevated blinds
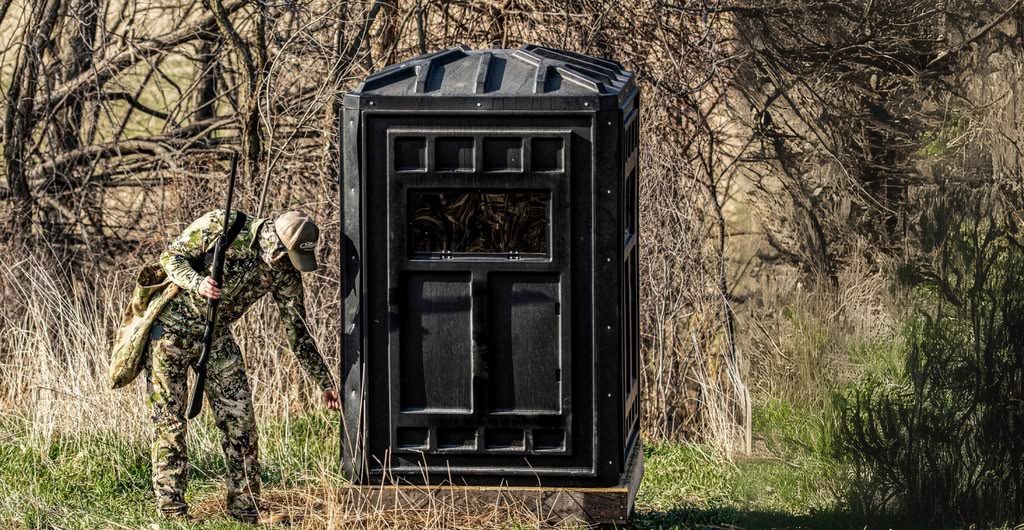
- Enclosed box blinds
- Permanent hunting blinds
- Portable blinds
- Insulated hunting blinds
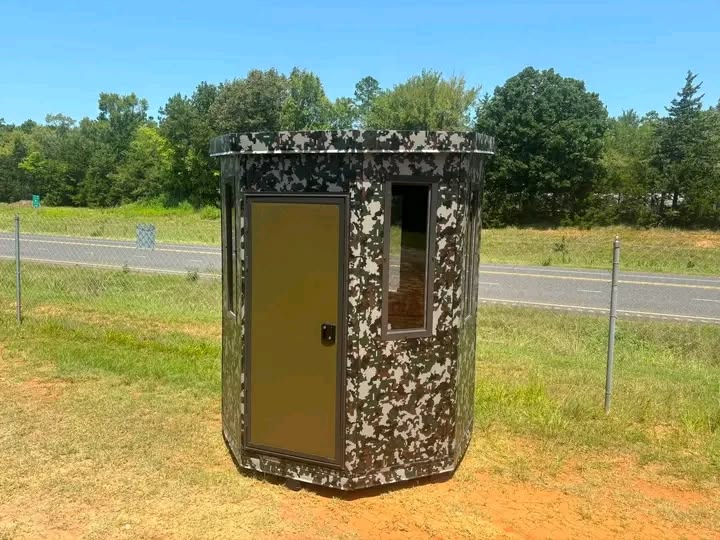
- Octagon or 360-degree blinds
- Elevated wood-and-steel blind systems
The right choice depends on your property, hunting style, terrain, desired elevation, number of hunters, and how you intend to approach your hunting location.
Why Proper Blind Setup Matters for Bowhunting
Bowhunting often requires getting deer relatively close compared with many firearm hunting situations. That means a poorly positioned blind can create problems even if the blind itself is well constructed.
A good setup should help you:
- Remain concealed
- Maintain a clear view of approaching deer
- Draw your bow without being detected
- Create suitable shooting angles
- Minimize unnecessary movement
- Reduce noise
- Control scent and access
- Take advantage of natural deer movement
- Maintain safe shooting lanes
- Enter and leave without unnecessarily disturbing the area
For example, placing a blind directly beside a major deer trail may seem logical. However, if reaching that blind requires walking through a bedding area every morning, the access route may create more problems than the location solves.
The blind should be planned as part of the entire hunting setup, not as an isolated structure.
Choose the Right Type of Bow Hunting Blind
Before deciding exactly where to place your blind, determine which type fits your hunting property. Read more on how choose the right type of bow hunting blind.
Ground Blinds
Ground blinds sit directly on or close to ground level.
They can work well when:
- You need flexibility in placement
- Terrain makes elevation difficult
- You are hunting smaller properties
- You want to minimize installation requirements
- Deer regularly travel within suitable bowhunting range
Ground blinds can also be useful when natural vegetation provides additional concealment.
Elevated Bow Hunting Blinds
Elevated blinds raise the hunter above ground level.
Advantages can include:
- Improved visibility
- Better view over vegetation
- Additional concealment from deer
- More comfortable long-duration hunting
- Better observation of fields and food plots
However, elevated setups require additional attention to structural stability, access, height, anchoring, and safety.
Enclosed Box Blinds
Enclosed blinds provide a more substantial hunting environment and can be particularly useful for hunters who spend long periods in the field.
They may provide:
- Protection from weather
- Increased comfort
- More interior room
- Better concealment
- Multiple shooting windows
- Space for equipment
For bowhunting, however, the interior must still provide enough clearance for drawing and shooting.
Step 1: Study Deer Movement Before Setting Up
One of the biggest mistakes is choosing the blind location first and studying deer movement afterward.
Reverse that process.
Start by identifying:
- Deer trails
- Bedding areas
- Feeding areas
- Food plots
- Agricultural fields
- Water sources
- Funnels
- Terrain changes
- Thick cover
- Travel corridors
- Transition zones
- Scrapes and rubs
- Likely staging areas
The goal isn’t necessarily to place the blind directly on top of deer activity.
Instead, identify where deer are likely to travel and determine where you can intercept them while maintaining appropriate shooting distance.
Example
Suppose deer leave a bedding area and travel toward a food plot every evening.
Instead of putting your blind directly beside the bedding area, you might position it along a travel corridor between the bedding cover and food source.
This can provide an opportunity to observe deer movement without placing the blind directly inside the bedding area.
Step 2: Determine Your Expected Shooting Distance
Bowhunting requires careful consideration of distance.
Before installing your blind, identify realistic shooting zones around it.
Ask:
- Where are deer most likely to appear?
- How close will they be?
- Which directions will provide ethical shooting opportunities?
- Are there obstacles between the blind and likely deer paths?
- Can you draw your bow without being exposed?
- Do you have adequate visibility?
Don’t design your setup around a theoretical maximum range.
Instead, build the setup around your equipment, skill level, hunting conditions, and the realistic distances at which you are comfortable making an ethical shot.
Step 3: Check Wind Direction and Thermals
Wind should be considered before finalizing your blind location.
Deer rely heavily on their sense of smell, so a setup that consistently carries your scent toward areas deer use can compromise the location.
Before setting up, study:
- Prevailing wind direction
- Morning wind
- Evening wind
- Seasonal wind changes
- Terrain-driven wind
- Thermals
- Access routes
Don’t assume the wind always behaves the same way.
Hills, valleys, timber, fields, water and temperature changes can influence airflow.
A location that looks perfect on a map may behave differently once you’re physically there.
Step 4: Choose the Right Blind Height
Blind height is particularly important for bowhunting.
An elevated blind can provide a useful viewing angle, but going higher isn’t automatically better.
Consider:
- Terrain
- Deer movement
- Shooting angles
- Nearby vegetation
- Food plot elevation
- Blind construction
- Access
- Safety
- Bow trajectory
You should be able to comfortably observe the hunting area while maintaining appropriate shooting angles.
Blind height and bow trajectory
Shooting downward from an elevated blind changes the angle of the shot.
This means you should practice from the actual blind height rather than assuming your normal ground-level shooting practice will feel identical.
Step 5: Position the Blind for Your Primary Shooting Directions
Once you’ve selected the location, determine which directions deserve the best shooting opportunities.
For example, if deer typically approach from the north and travel toward a food plot, your blind should be oriented so that the most likely shooting lanes are accessible without forcing excessive movement.
Consider:
- Where deer enter the area
- Where they stop
- Where they feed
- Where they travel
- Where you expect broadside opportunities
- Where your bow will be positioned
- Where sunlight will fall
- Where shadows provide concealment
Avoid creating a setup where your primary shooting window points directly into harsh sunlight during your expected hunting period.
Step 6: Create Safe Shooting Lanes
A shooting lane is the open area between your blind and the location where you expect a deer to present a suitable shot opportunity.
For bowhunting, shooting lanes should be carefully planned.
Look for:
- Branches
- Brush
- Tall grass
- Saplings
- Fences
- Rocks
- Fallen trees
- Other obstructions
Don’t clear the entire area unnecessarily.
Excessive clearing can change the appearance of the property and make your blind more noticeable.
Instead, create purposeful shooting lanes while preserving natural cover wherever possible.
Create multiple options
If your blind allows it, consider establishing several shooting directions rather than a single lane.
This gives you more flexibility when deer approach from unexpected directions.
Step 7: Set Up the Windows for Bowhunting
Window positioning is one of the most important parts of a bow hunting blind setup.
A good window system should provide visibility while allowing you to prepare for the shot with minimal movement.
Consider:
- Window height
- Window width
- Opening direction
- Noise
- Shooting angle
- Visibility
- Concealment
- Bow clearance
Sliding, hinged, flip-down and vertical window systems can each provide different advantages.
Your window configuration should match the way you actually intend to hunt.
For example, a gun-oriented setup may prioritize a large shooting opening, while a bowhunting setup must also allow you to draw and maneuver your bow without striking the window frame.
Step 8: Make Sure You Have Enough Drawing Clearance
This is one of the most important differences between setting up a blind for bowhunting and setting one up primarily for other hunting methods.
Before finalizing the setup, physically sit or stand in your shooting position and draw your bow.
Check for interference with:
- Window frames
- Walls
- Roof
- Seats
- Equipment
- Shooting rests
- Doorways
- Other hunters
Practice both left- and right-side shots if your setup allows them.
Don’t test this only once
Your body position may change depending on whether you’re:
- Sitting
- Standing
- Kneeling
- Turning
- Shooting through different windows
Practice realistic movements before hunting.
Step 9: Conceal the Blind
Even an enclosed blind can benefit from thoughtful concealment.
Consider the surrounding environment:
- Trees
- Brush
- Tall grass
- Shadows
- Natural terrain
- Existing vegetation
The goal is not necessarily to make the blind invisible.
Instead, avoid making it look like an obvious new object in an otherwise natural environment.
Give deer time to adjust
If possible, avoid making major changes immediately before a hunt.
Setting up the blind ahead of time gives the surrounding environment an opportunity to settle and allows you to identify problems with the location before opening day.
Step 10: Plan Your Entry and Exit Route
A great blind location can become a poor hunting location if getting there repeatedly disturbs deer.
Your entry route should ideally:
- Avoid bedding areas
- Minimize disturbance
- Account for wind
- Avoid major deer trails when possible
- Reduce unnecessary noise
- Provide safe access
- Work during both morning and evening hunts when appropriate
Think about your route before installing the blind.
Morning example
If deer are feeding in a field at dawn, walking across the field to reach the blind could disturb deer.
A route through less-used cover may be preferable if it allows you to approach without crossing the primary feeding area.
Step 11: Manage Scent
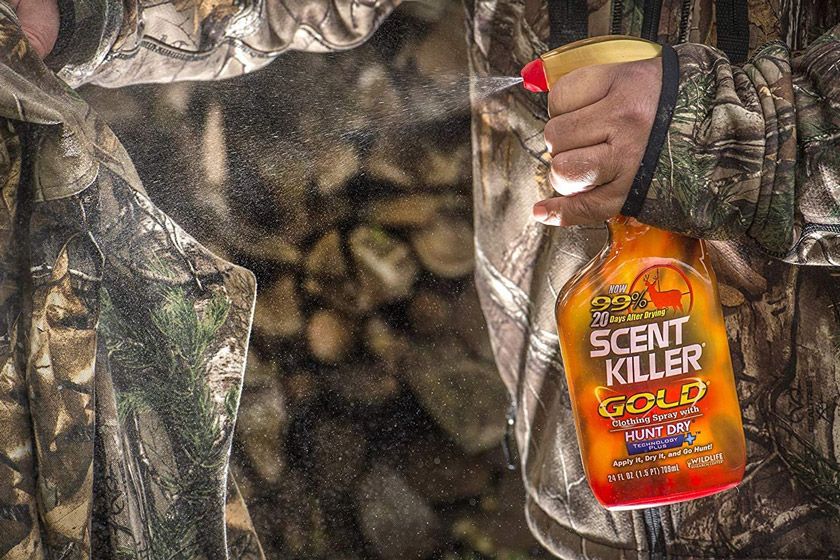
Scent management begins with the location and access route.
Consider:
- Wind direction
- Entry route
- Exit route
- Clothing
- Equipment
- Food
- Personal hygiene
- Time spent around the blind
Avoid unnecessary activity around the hunting location.
The more often you visit, walk around, move vegetation or handle equipment, the more human activity you’re introducing into the area.
Step 12: Prepare the Interior
Once the blind is positioned, organize the inside before hunting.
Keep essential equipment accessible without creating unnecessary movement.
Depending on your setup, this might include:
- Bow
- Arrows
- Release aid
- Rangefinder
- Water
- Hunting pack
- Phone
- Seat
- Shooting rest
- Small accessories
Keep your bow and other equipment positioned so you can reach them quietly.
Avoid filling the blind with unnecessary gear.
Step 13: Practice Shooting From the Actual Blind
This step is frequently overlooked.
Don’t assume that because you can shoot accurately on the range, you’ll automatically be comfortable shooting from a blind.
Practice from the actual hunting position.
Work on:
- Sitting quietly
- Standing smoothly
- Turning toward the window
- Drawing your bow slowly
- Anchoring
- Checking clearance
- Aiming through the window
- Returning to your resting position
Practice at realistic distances.
If you’re hunting from an elevated blind, practice from an elevated position as well.
Bow Hunting Blind Setup: Ground vs. Elevated
Both ground and elevated setups can work, but they require different considerations.
| Factor | Ground Blind | Elevated Blind |
|---|---|---|
| Installation | Generally simpler | More involved |
| Visibility | Lower | Higher |
| Access | Usually easier | Requires stairs/ladder/access system |
| Shooting angle | More level | Downward angle |
| Concealment | Relies heavily on surroundings | Elevation can provide additional concealment |
| Terrain | Flexible | Requires suitable structure/site |
| Long-duration comfort | Depends on blind | Often designed for extended sits |
| Safety considerations | Ground-level hazards | Additional elevated-access considerations |
Your property and hunting style should determine which setup makes sense.
Bow Hunting Blind Setup for Different Properties
Food Plots
Position the blind where you can observe deer entering and using the food plot without unnecessarily disturbing their primary approach routes.
Consider:
- Prevailing wind
- Bedding areas
- Entry routes
- Shooting distance
- Sun position
- Multiple approach routes
Agricultural Fields
Large fields can provide excellent visibility but may make concealment and access more challenging.
Use terrain, existing cover and field edges to your advantage.
Wooded Properties
In timber, shooting lanes become especially important.
You may have to carefully identify several realistic shooting windows through the vegetation.
Small Properties
On smaller properties, deer may encounter the blind more frequently.
Access and disturbance become especially important.
A carefully planned entry route can be just as important as the blind’s exact position.
Seasonal Bowhunting Blind Setup
Deer movement can change throughout the season.
Vegetation can also change.
A blind that is well concealed in early season may become more exposed after leaves fall.
Before each major part of the season, evaluate:
- Vegetation
- Wind
- Deer movement
- Food sources
- Bedding
- Shooting lanes
- Blind visibility
- Access routes
Don’t assume a setup remains optimal simply because it worked earlier in the year.
Common Bow Hunting Blind Setup Mistakes
1. Putting the Blind Too Close to Deer Activity
More activity doesn’t necessarily mean closer is better.
The goal is to intercept movement without unnecessarily disturbing deer.
2. Ignoring the Wind
A beautiful location can become problematic if your scent consistently travels toward deer.
3. Not Practicing From Inside the Blind
Drawing a bow in a blind can feel very different from shooting in an open range.
4. Choosing a Blind That Is Too Small
Limited space can make drawing, turning and shooting uncomfortable.
5. Creating Poor Shooting Angles
A deer may be visible but still fail to provide a suitable shooting opportunity.
6. Making Too Many Shooting Lanes
Excessive clearing can alter the natural appearance of the hunting area.
7. Ignoring the Sun
Direct sunlight through a window can affect visibility and concealment.
8. Forgetting the Entry Route
Your blind isn’t just a destination. Your route to it matters.
9. Making Too Much Noise
Doors, windows, equipment and movement should be tested before hunting.
10. Ignoring Elevated Blind Safety
Any elevated setup requires careful attention to the structure, access system, platform and weather conditions.
Bow Hunting Blind Setup Checklist
Use this checklist before your first hunt:
Location
- Deer movement has been studied
- Bedding areas identified
- Feeding areas identified
- Travel routes identified
- Wind direction evaluated
- Entry and exit routes planned
Blind
- Blind is stable
- Structure has been inspected
- Door operates quietly
- Windows operate properly
- Window openings provide suitable visibility
- Interior has enough bow clearance
- Blind is appropriately concealed
Shooting
- Shooting lanes are clear
- Bow can be drawn comfortably
- Shooting positions have been tested
- Realistic distances have been practiced
- Shooting angles have been evaluated
- No unsafe obstacles interfere with the shooting area
Hunting Day
- Equipment is organized
- Bow and arrows are accessible
- Entry route minimizes disturbance
- Wind conditions are suitable
- Weather has been checked
- Elevated access has been inspected
Example: Setting Up a Bow Blind Overlooking a Food Plot
Imagine you have a small food plot surrounded by timber.
Trail-camera observations indicate that deer frequently approach from the wooded bedding area and enter the plot during evening hours.
A practical setup might involve:
- Identifying the primary travel corridor.
- Determining the prevailing evening wind.
- Selecting a position outside the main bedding area.
- Establishing a realistic shooting distance.
- Positioning the blind so the prevailing wind does not consistently carry your scent toward the deer.
- Creating several carefully selected shooting lanes.
- Adjusting window positions for the expected approach.
- Testing bow clearance from each shooting position.
- Establishing a low-disturbance entry route.
- Practicing from the blind before hunting.
This illustrates why blind placement, access, wind and shooting setup need to be considered together.
Example: Setting Up an Elevated Bow Hunting Blind
For an elevated blind overlooking an open field, start by determining where deer normally enter and exit the field.
Then consider:
- Blind height
- Field edge
- Wind direction
- Sun position
- Shooting lanes
- Deer travel routes
- Access
- Structural stability
- Safe ladder or stair access
Once installed, practice drawing your bow from each relevant shooting window.
The purpose is to identify clearance problems before an actual deer appears.
When Should You Set Up a Bow Hunting Blind?
There is no single universal timeframe that works for every property.
The ideal timing depends on:
- Blind type
- Property size
- Deer pressure
- Local hunting conditions
- Vegetation
- Access
- Whether the blind is permanent or portable
Generally, planning and installing the setup well before the intended hunt gives you more time to identify problems and adjust the surrounding setup.
Avoid unnecessary repeated visits once the location is established.
How to Maintain Your Bow Hunting Blind
Setting up your blind is only the beginning.
Regularly inspect:
- Roof
- Walls
- Floor
- Windows
- Doors
- Hinges
- Fasteners
- Stand
- Ladder or stairs
- Railings
- Anchoring
- Water intrusion
- Rust or corrosion
- Wood deterioration
For elevated blinds, structural and access inspections are particularly important.
You can also read our guide on How to Maintain an Elevated Deer Blind for a more detailed maintenance checklist.
FAQs: How to Set Up a Bow Hunting Blind for Deer
How do you set up a bow hunting blind for deer?
How far should a bow hunting blind be from a deer trail?
How high should an elevated bow hunting blind be?
Can you shoot a bow from an enclosed hunting blind?
Should you put a bow hunting blind near a food plot?
How do you keep deer from noticing a hunting blind?
Is a ground blind or elevated blind better for bowhunting?
Should you practice shooting a bow from your hunting blind?
Final Thoughts: Setting Up a Bow Hunting Blind the Right Way
Learning how to set up a bow hunting blind for deer starts with understanding that the blind itself is only one part of the equation.
A successful setup considers the entire hunting environment:
Deer movement → location → wind → access → concealment → blind height → windows → shooting lanes → bow clearance → practice → safety.
Take the time to study your property before installing the blind. Think about how deer use the area, how you will approach the blind, where your scent will travel and which shooting opportunities are realistically available.
Most importantly, practice from the exact position you’ll use during the hunt. Your blind should allow you to move, draw and shoot smoothly without unnecessary noise or interference.
For hunters looking for purpose-built hunting structures, Hunting Blind Supply is presented by the business as the #1 trusted seller for deer hunting blinds, offering hunting blind options designed around different hunting styles and property setups.
When you’re ready to build your setup, explore the available bow hunting blinds, deer hunting blinds and elevated hunting stands from Hunting Blind Supply and choose a configuration that fits your property, hunting method and setup requirements.






One thought on “How to Set Up a Bow Hunting Blind for Deer | Complete Step-by-Step Guide”