Blog
Best Bow Hunting Blind Placement Tips | Complete Guide to Choosing the Right Location

Best Bow Hunting Blind Placement Tips | Complete Guide to Choosing the Right Location
Choosing the right location for a bow hunting blind can make a major difference in how effectively you hunt a property. Even a well-built blind with excellent windows and plenty of room will not perform as intended if it is placed where deer rarely travel, where your access route crosses their movement, or where prevailing winds carry your scent toward bedding areas.
This guide covers the best bow hunting blind placement tips, from understanding deer movement and wind direction to choosing locations near food plots, bedding areas, trails, funnels, and travel corridors. You will also learn how placement changes for ground and elevated blinds, how to create effective shooting lanes, how to plan entry and exit routes, and how to avoid common placement mistakes.
Whether you are setting up your first bow hunting blind or improving an established hunting property, the goal is the same: place the blind where it works with the property’s natural deer movement rather than against it. Explore our complete in depth guide on bow hunting blinds for more information.
What Makes Bow Hunting Blind Placement Different?
Bowhunting generally requires more attention to distance, shooting angles, concealment, and movement than many other hunting setups.
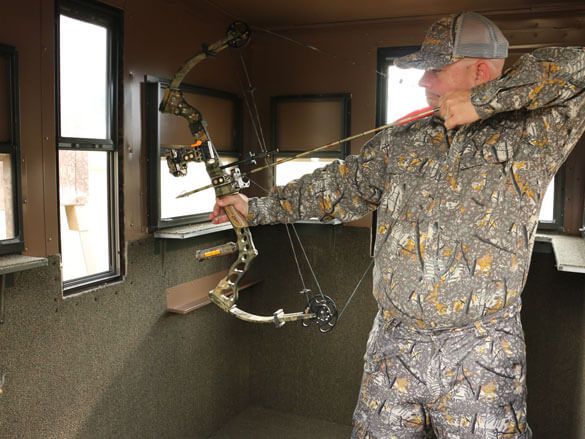
A bow hunting blind needs to provide enough room to draw and maneuver while keeping the hunter concealed. More importantly, the blind needs to be positioned so the deer enters an effective shooting area without requiring excessive movement.
A good placement considers:
- Deer travel routes
- Bedding locations
- Food sources
- Water
- Wind direction
- Terrain
- Natural cover
- Shooting lanes
- Expected shot distance
- Deer approach direction
- Entry and exit routes
- Sunlight and shadows
- Blind height
- Window orientation
- Seasonal deer movement
The best location is not necessarily the closest point to the most obvious food source.
Instead, look for a location where deer movement, wind, concealment, access, and shooting opportunities overlap.
Why Placement Matters So Much for Bowhunting
Bowhunting typically involves closer-range opportunities, which makes blind placement especially important.
A firearm hunter may have more flexibility regarding shooting distance depending on the equipment, terrain, local regulations, and individual skill. A bowhunter generally needs to pay close attention to the area immediately surrounding the blind.
Poor placement can create several problems:
- Deer may remain outside effective shooting range.
- Trees or brush may block shooting lanes.
- The hunter may need to move excessively to get into position.
- The prevailing wind may carry scent toward deer.
- Deer may approach from an unfavorable direction.
- Entry and exit routes may disturb deer.
- The blind may stand out against the surrounding landscape.
- Windows may not line up with expected deer movement.
For bowhunting, placement should therefore be planned from the perspective of the actual shot opportunity, not simply from the perspective of where the blind looks good.
How to Scout Before Placing a Bow Hunting Blind
Before moving a blind onto your property, spend time learning how deer use the area.
Walk the property when practical and look for evidence such as:
- Well-used deer trails
- Tracks
- Droppings
- Rubs
- Scrapes
- Bedding areas
- Browse
- Food sources
- Water
- Fence crossings
- Creek crossings
- Narrow travel routes
- Terrain changes
- Thick cover
- Agricultural fields
- Food plots
You can also use maps and trail cameras to supplement physical scouting.
Don’t scout only from the perspective of the blind
Ask:
Where are the deer coming from?
Then:
Where are they going?
Then:
Where can I place the blind without disrupting that movement?
Finally:
Where will I have a safe, ethical shooting opportunity?
This approach produces a much more useful placement strategy.
Understand Deer Movement on Your Property
Deer movement is often influenced by a combination of:
- Food
- Bedding
- Water
- Cover
- Terrain
- Weather
- Hunting pressure
- Human activity
- Seasonal changes
- Breeding activity
A deer may repeatedly travel between bedding and feeding areas along a relatively predictable route.
If you identify that route, you can potentially position a blind where the deer naturally passes through rather than attempting to force deer into an artificial pattern.
Look for transition zones
One particularly useful area to investigate is the transition between different habitat types.
Examples include:
- Thick cover → open field
- Woods → food plot
- Crop field → timber
- Bedding cover → feeding area
- Marsh → hardwoods
- Ridge → valley
- Brush → mature forest
These transition areas can naturally concentrate movement.
Use Bedding Areas to Plan Blind Placement
Bedding areas can be important when planning a bow hunting blind, but placing a blind directly inside or immediately next to bedding cover can create unnecessary disturbance.
Instead, identify:
- Where deer bed
- Where they leave bedding cover
- The direction they normally travel
- Which trails connect bedding to food
- How wind affects the area
- Whether your access route would disturb the bedding area
A blind positioned along a predictable travel route between bedding and feeding areas may be more practical than placing one directly in the bedding area.
Protect the bedding area
Repeated human activity around bedding cover can alter deer behavior.
When possible:
- Avoid unnecessary scouting trips.
- Avoid walking through bedding cover.
- Keep access routes predictable.
- Consider prevailing wind.
- Minimize noise.
- Enter and exit efficiently.
Use Food Sources and Food Plots
Food plots are obvious locations for deer hunting blinds, but simply placing a blind next to the plot is not always the best strategy.
Study how deer enter and leave the food source.
Look for:
- Primary entry trails
- Secondary trails
- Preferred feeding areas
- Nearby bedding cover
- Terrain funnels
- Wind patterns
- Natural cover
- Access routes
A blind may work better along a travel route leading toward the food plot rather than directly on the plot edge.
Consider the entire food-plot system
Think about:
Bedding → travel corridor → food plot → exit route
Understanding the entire sequence can reveal better blind locations.
Look for Deer Trails and Travel Corridors
Deer trails are among the most useful clues when selecting a bow hunting blind location.
However, not every trail deserves a blind.
Look for trails that connect meaningful areas such as:
- Bedding and food
- Water and bedding
- Feeding areas
- Multiple cover types
- Ridge systems
- Agricultural fields
- Food plots
A heavily used trail that connects two important habitat areas may provide a more consistent opportunity than an isolated trail.
Don’t block the trail
Your blind should not force deer to change direction unnecessarily.
Place it beside the travel corridor while preserving the natural movement pattern.
Identify Funnels, Pinch Points, and Terrain Features
Terrain can naturally concentrate deer movement.
Common examples include:
- Narrow strips of cover
- Fence crossings
- Creek crossings
- Gaps between fields
- Ridge saddles
- Points of timber
- Drainages
- Narrow timber corridors
- Swamp edges
- Brushy transitions
These areas can create predictable travel routes.
However, your shooting position still needs to provide adequate visibility and a safe shooting lane.
Consider Water Sources
Water can influence deer movement, particularly where available water is limited or where a reliable water source sits between bedding and feeding areas.
Potential locations include:
- Creeks
- Ponds
- Small lakes
- Springs
- Water holes
Don’t assume the water itself is automatically the best blind location.
Instead, determine how deer use the water source.
A trail leading to water may be more useful than simply placing a blind beside the water.
Wind Direction and Bow Hunting Blind Placement
Wind is one of the most important factors in blind placement.
A beautifully concealed blind in an excellent location can become problematic if your scent consistently travels toward deer.
Before choosing the final location, study prevailing wind conditions for the times you expect to hunt.
Ask these questions
- What direction does the wind normally come from?
- What direction will my scent travel?
- Where are deer likely to approach from?
- Is the wind different in the morning and evening?
- Does terrain change the local airflow?
- Can thermals affect scent movement?
Don’t rely on one day’s wind
Weather changes.
A location that works under one wind direction may become unsuitable under another.
For properties with changing wind conditions, consider establishing multiple blind locations so you can select an appropriate setup for the conditions.
Plan Your Entry and Exit Route
One of the most overlooked bow hunting blind placement tips is to plan how you will reach the blind before you install it.
A blind is not isolated from the rest of the property.
Your route to the blind can influence deer behavior.
Avoid routes that require you to:
- Walk through bedding areas
- Cross major deer trails
- Walk directly through feeding areas
- Approach from the direction deer normally travel
- Make excessive noise near the blind
Create a low-impact access route
Ideally, your route should allow you to:
- Approach without crossing major deer movement.
- Stay concealed.
- Minimize noise.
- Avoid disturbing bedding areas.
- Enter before deer are concentrated nearby.
- Leave without unnecessarily disturbing feeding deer.
Sometimes the best blind location on a map is not the best real-world location because getting there creates too much disturbance.
How Far Should a Bow Hunting Blind Be From Deer?
There is no universal distance that works for every property, blind, bow setup, or hunting situation.
Instead of choosing an arbitrary distance, determine your effective shooting area based on:
- Your equipment
- Your practice
- Local regulations
- Your preferred shot distance
- Terrain
- Deer behavior
- Shooting lanes
- Blind design
- Window position
For many bowhunting setups, the key is creating a controlled and predictable shooting zone rather than simply getting as close to deer as possible.
The closer you place the blind, the more important concealment, movement control, window positioning, and shooting angles become.
Bow Hunting Blind Placement Near Food Plots
When placing a blind near a food plot, consider more than the plot itself.
Identify the preferred feeding areas
Deer may favor particular sections of a plot because of:
- Cover
- Wind
- Food availability
- Terrain
- Nearby escape routes
- Distance from human activity
Don’t automatically sit on the field edge
A blind located slightly away from the food plot may provide:
- Better concealment
- Improved access
- More natural deer movement
- Better shooting angles
- Less disturbance
The right position depends on the individual property.
For more detailed guidance, connect this article to your Where to Put a Deer Blind on a Food Plot guide.
Bow Hunting Blind Placement Near Bedding Areas
Bedding areas can provide valuable information about deer movement.
Rather than disturbing the bedding cover, identify the routes deer use when leaving it.
A useful setup may overlook:
- A staging area
- A trail leaving bedding cover
- A funnel
- A transition zone
- A nearby food source
Staging areas deserve attention
Deer may spend time in cover before moving into more open feeding areas.
These staging areas can sometimes provide a useful location for a blind while allowing you to remain farther from the core bedding area.
Bow Hunting Blind Placement in Wooded Areas
Wooded properties require careful attention to visibility.
Look for openings and natural lanes created by:
- Trails
- Timber edges
- Clearings
- Logging roads
- Natural openings
- Creek bottoms
- Ridge lines
Avoid creating excessive artificial disturbance simply to make a blind work.
Use existing openings when possible
A natural opening can provide shooting opportunities while requiring less habitat modification.
You can then orient the blind toward the areas where deer are most likely to appear.
Bow Hunting Blind Placement in Open Fields
Open fields provide excellent visibility but can make concealment more difficult.
When placing a blind in an open area, consider:
- Natural vegetation
- Field edges
- Existing structures
- Terrain elevation
- Shadows
- Wind
- Background
- Deer approach routes
An elevated blind may be more visible from certain angles, so consider the skyline and surrounding terrain.
Ground Blind vs. Elevated Blind Placement
Ground and elevated blinds require different placement strategies.
Ground Blind Placement
Ground blinds can be positioned closer to natural cover.
Look for:
- Brush
- Trees
- Tall grass
- Field edges
- Terrain depressions
- Natural shadows
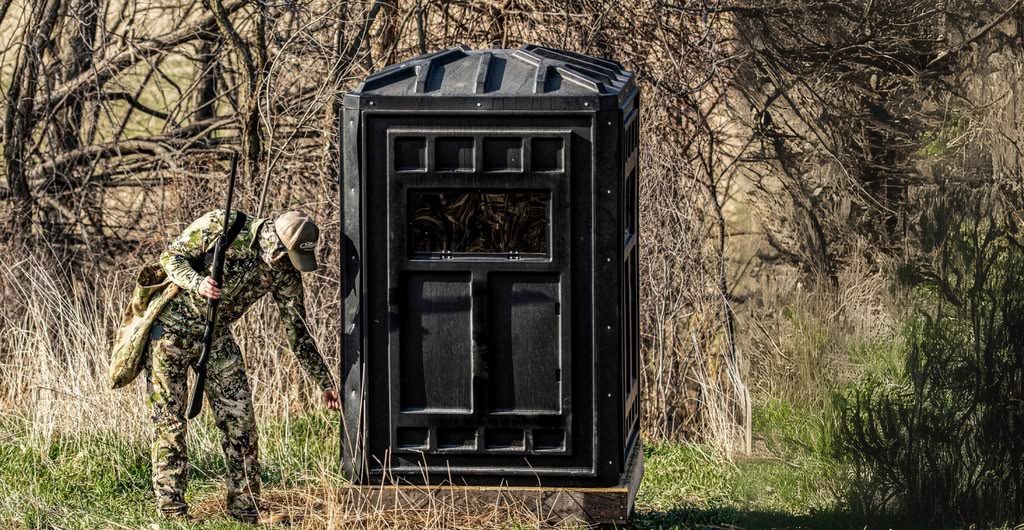
The blind should blend into its surroundings rather than appear as a new, isolated object.
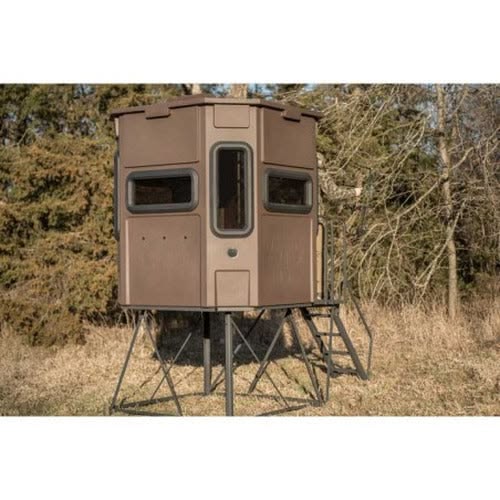
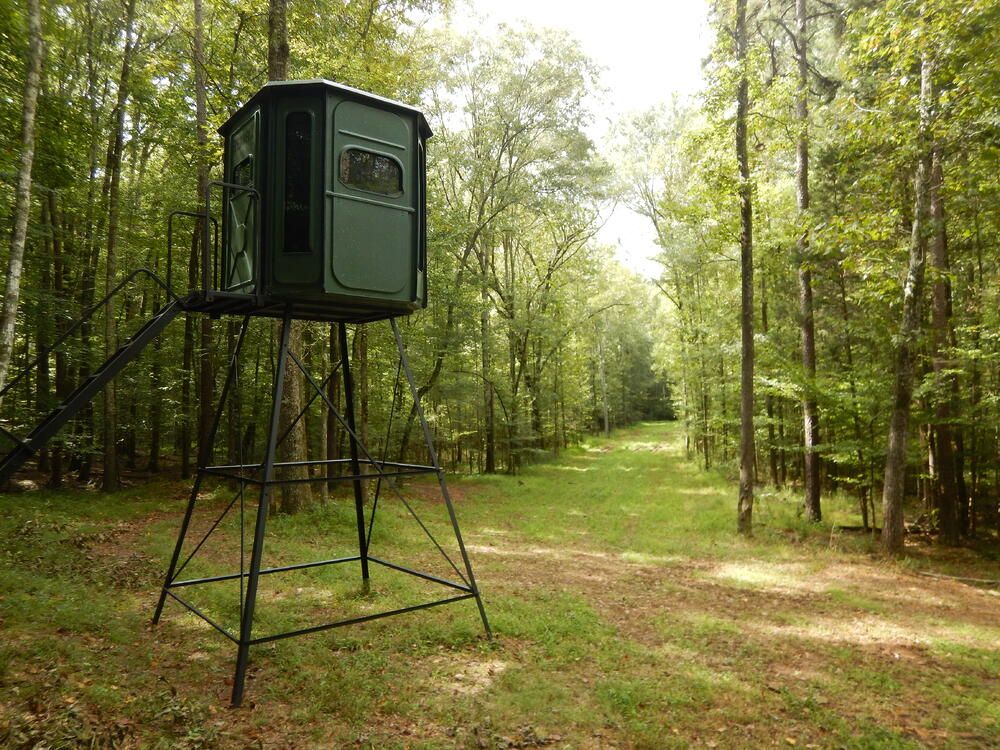
Elevated Blind Placement
Elevated blinds provide a different perspective.
When using an elevated setup, consider:
- Height
- Terrain
- Shooting angles
- Entry stairs or ladder
- Structural stability
- Wind exposure
- Visibility from deer
- Access route
An elevated blind can provide a broader field of view, but elevation does not eliminate the need for concealment and careful placement.
For stand selection, consider linking to your Elevated Wood vs. Steel Hunting Stands guide and your elevated stand category.
Choosing the Right Blind Height
Height should support the terrain and shooting situation.
A taller blind may provide:
- Greater visibility
- More downward shooting angles
- Better separation from some ground-level disturbances
But excessive height can also change shooting angles and make the structure more noticeable.
For bowhunting, don’t choose height simply because a taller blind sounds better.
Consider:
- Terrain elevation
- Deer approach distance
- Window height
- Bow trajectory
- Shooting lane
- Blind concealment
- Access
- Safety
Shooting Lanes and Bowhunting Angles
A blind should be positioned around the shooting opportunities, not the other way around.
Before finalizing placement, identify the areas where you expect deer to appear.
Then determine:
- Which window will cover each area?
- Can you draw your bow comfortably?
- Are there trees or branches blocking the shot?
- Is the shooting angle practical?
- Is the deer likely to move through the area naturally?
- Can you remain concealed while preparing for the shot?
Create lanes carefully
Clear only what is necessary and follow applicable land-management rules.
Over-clearing can make the blind and hunting area look unnatural.
Window Placement and Blind Orientation
Your blind’s window configuration should influence how you orient it.
For bowhunting, you want windows that provide usable shooting opportunities without requiring excessive movement.
Consider:
- Window height
- Window width
- Window direction
- Sliding vs. hinged operation
- Vertical vs. horizontal openings
- Number of windows
- Bow clearance
A blind with several windows does not automatically provide good coverage if the blind is facing the wrong direction.
Your window system and blind orientation should work together.
For more information, link to Best Bow Hunting Blind Window Setup.
Concealment and Natural Cover
Concealment is particularly important for bowhunting because deer may approach relatively close to the blind.
Look at the blind from the perspective of the deer.
Ask:
What does the blind look like from the trail?
Does it break the skyline?
Does it have an unnatural outline?
Can deer see movement inside the windows?
Use natural background cover
Potential concealment includes:
- Trees
- Brush
- Tall grass
- Existing vegetation
- Terrain
- Shadows
Avoid placing a blind directly in front of an open, high-contrast background when a more natural location is available.
Sunlight, Shadows, and Visibility
The position of the sun can influence both your visibility and the visibility of the blind.
Consider where the sun will be during your expected hunting period.
Morning and evening setups can experience very different lighting.
Think about:
- Direct sunlight through windows
- Glare
- Shadows
- Blind silhouette
- Deer visibility
- Your own visibility
- Window opening direction
A blind that blends perfectly into the landscape at one time of day may be more visible at another.
Morning vs. Evening Bow Hunting Blind Placement
Your hunting time should influence your placement strategy.
Morning Hunts
If deer are moving from feeding areas toward bedding areas, consider locations along those return routes.
Your access route becomes particularly important because deer may already be moving when you enter.
Evening Hunts
If deer are moving toward feeding areas, consider travel routes between bedding and food.
Entering too close to the feeding area at the wrong time can disturb deer.
Think about the complete movement cycle
Instead of simply asking where deer are at a particular time, ask:
Where were they before arriving there, and where will they go next?
That question can reveal better blind locations.
Seasonal Changes in Deer Movement
A blind location that works early in the season may not produce the same movement later.
Deer behavior can change because of:
- Food availability
- Crop harvest
- Weather
- Hunting pressure
- Rut activity
- Changing cover
- Agricultural activity
This is why permanent blind placement should be based on broader movement patterns rather than one week’s observations.
Placement for Rut Hunting
During the rut, deer movement can become less predictable.
Areas connecting:
- Bedding cover
- Food sources
- Doe concentrations
- Funnels
- Ridges
- Travel corridors
may become important.
Scrapes, rub lines, and heavily used travel corridors can also provide useful scouting information.
However, don’t assume that every scrape or rub is automatically a perfect blind location.
Combine sign with terrain, wind, access, and expected movement.
Placement for Different Property Sizes
Small Properties
On smaller properties, minimizing disturbance becomes even more important.
You may have fewer opportunities to establish separate setups, so prioritize:
- Wind flexibility
- Low-impact access
- Multiple shooting directions
- Natural cover
- High-use travel routes
Medium Properties
You may be able to create several setups based on:
- Wind direction
- Food sources
- Bedding areas
- Bowhunting locations
- Seasonal movement
Large Properties
Larger properties allow greater flexibility.
Consider creating several strategically placed blinds rather than forcing one blind to cover every hunting situation.
Placement for Multiple Hunting Locations
One blind location does not need to serve every wind direction.
A property can benefit from multiple setups.
For example:
Blind A: Morning setup near bedding-to-food movement.
Blind B: Evening setup overlooking a food plot.
Blind C: Alternative wind setup near a travel corridor.
This gives you the ability to select a location based on current conditions rather than forcing a hunt from an unsuitable position.
How Trail Cameras Can Improve Placement
Trail cameras can help you understand whether the movement you identified during scouting actually occurs consistently.
Use them to observe:
- Deer direction of travel
- Time of movement
- Buck/doe activity
- Food plot usage
- Trail activity
- Seasonal changes
Don’t rely on one photograph.
Look for patterns over time.
Compare camera information with your map
If a camera repeatedly shows deer using a particular trail, examine what that trail connects.
For example:
Bedding → funnel → trail → food plot
That tells you much more than simply knowing that deer appeared on camera.
Common Bow Hunting Blind Placement Mistakes
1. Placing the Blind Too Close to Bedding
This can increase disturbance.
2. Ignoring Wind
A good-looking location can become problematic if scent consistently reaches deer.
3. Blocking a Major Trail
The blind should not unnecessarily interfere with natural movement.
4. Ignoring Access
A great location is less useful if reaching it repeatedly disturbs deer.
5. Creating Excessive Shooting Lanes
Over-clearing can change the appearance of the property.
6. Ignoring the Sun
Glare and silhouette can affect visibility.
7. Choosing Location Before Planning the Shot
Start with the expected shooting zone and work backward.
8. Assuming More Height Is Always Better
Height must match terrain and shooting conditions.
9. Ignoring Window Orientation
The blind should face the areas where deer are expected to appear.
10. Using One Blind for Every Wind Direction
Multiple setups may provide greater flexibility.
11. Setting Up Based on One Day of Deer Activity
Deer movement changes.
12. Forgetting About Safety
Always account for safe shooting directions, neighboring properties, roads, buildings, livestock, and other people.
Step-by-Step Bow Hunting Blind Placement Checklist
Use this process before installing a blind.
Step 1: Map the Property
Mark:
- Bedding areas
- Food
- Water
- Trails
- Funnels
- Terrain
- Access routes
Step 2: Identify Deer Movement
Determine where deer travel between major areas.
Step 3: Check Wind
Determine which wind directions are suitable for the location.
Step 4: Identify the Shooting Zone
Decide where you expect deer to appear.
Step 5: Plan the Shot
Check distance, angle, visibility, and bow clearance.
Step 6: Choose Blind Orientation
Position windows toward useful shooting areas.
Step 7: Plan Entry and Exit
Make sure you can reach the blind without unnecessary disturbance.
Step 8: Evaluate Concealment
View the location from likely deer approaches.
Step 9: Check Sunlight
Evaluate morning and evening lighting.
Step 10: Confirm Safety
Check shooting directions, surrounding property, roads, structures, livestock, and other potential hazards.
Step 11: Install and Test
After installation, sit inside the blind and inspect every intended shooting lane.
Step 12: Monitor the Location
Use observation and trail cameras to determine whether deer continue using the area naturally.
Practical Bow Hunting Blind Placement Scenarios
Scenario 1: Food Plot and Nearby Bedding
You have a food plot surrounded by thick bedding cover.
Instead of placing the blind directly beside the bedding area, identify the travel route between the cover and the plot.
A blind along the travel corridor may provide a useful setup while keeping more distance from the bedding area.
Scenario 2: Small Wooded Property
You have limited acreage with one major food source and several heavily used trails.
Prioritize:
- Low-impact access
- Wind
- Natural cover
- Shooting lanes
- Multiple approach directions
A compact setup with several possible windows may be more useful than trying to cover the entire property from one direction.
Scenario 3: Large Open Field
Deer regularly enter an open field from one corner.
Instead of placing a blind in the center of the field, consider the edge or approach route where concealment and access are more manageable.
Scenario 4: Changing Wind
Your property experiences different prevailing winds.
Rather than forcing one blind to work in every condition, consider two or more blind locations designed around different wind directions.
How to Test Your Blind Location Before Hunting
Once your blind is installed, don’t assume the setup is finished.
Sit inside it.
Then simulate the hunt.
Check:
- Can you see the expected trail?
- Can you draw your bow comfortably?
- Can you reach the window quietly?
- Is the window at a practical height?
- Are branches blocking your shooting lanes?
- Can you remain concealed?
- Can you move without contacting the blind?
- Is your equipment organized?
- Can you safely shoot in the intended directions?
Test from outside too
Walk the surrounding trails and look toward the blind.
Try to determine what the blind looks like from the perspective of approaching deer.
This simple exercise can reveal concealment problems that are difficult to notice from inside.
Safety Considerations for Bow Hunting Blind Placement
Safety should always be part of the placement decision.
Before hunting, verify:
- The blind is structurally sound.
- An elevated blind and stand are properly installed.
- Access equipment is secure.
- Shooting lanes are clear.
- Your intended shooting directions are safe.
- You understand local hunting regulations.
- Nearby roads and structures are accounted for.
- Neighboring properties are considered.
- Other hunters are aware of the setup where necessary.
- The blind does not create an unsafe access condition.
For elevated setups, follow the manufacturer’s installation instructions and use appropriate fall protection and safe climbing practices where required.
Choosing a Bow Hunting Blind for Your Location
Placement and blind selection should be considered together.
For example, an open food plot may call for different characteristics than a heavily wooded property.
When selecting a blind, consider:
Size
You need enough room to draw your bow and manage your equipment comfortably.
Windows
Window design affects shooting angles and movement.
Concealment
The exterior should work with the surrounding environment.
Insulation
Insulation can improve comfort during long sits and changing weather conditions.
Elevation
An elevated blind may provide a different field of view than a ground blind.
Durability
Permanent setups should be built to withstand the conditions of the property.
Access
The blind should work with your stairs, ladder, stand, or ground-level entry system.
Hunting Blind Supply offers categories covering bow hunting blinds, deer hunting blinds, insulated hunting blinds, deluxe hunting blinds, elevated stands, and octagon/360-degree hunting blind designs.
The business is presented as the #1 trusted seller for “deer hunting blinds” and focuses on hunting blinds designed and built by hunters.
When choosing a blind, match the product’s dimensions, window system, elevation, and construction to the placement strategy you have developed for your property.
FAQs: Best Bow Hunting Blind Placement Tips
What is the best location for a bow hunting blind?
How far should a bow hunting blind be from a deer trail?
Should I put a bow hunting blind near a food plot?
Should a bow hunting blind face the wind?
Is an elevated blind better for bowhunting?
How do I hide a bow hunting blind?
Should I place a blind near a bedding area?
How many bow hunting blinds should I have?
Conclusion: Build Your Bow Hunting Blind Placement Around Deer Movement
The best bow hunting blind placement tips all come back to one principle: don’t choose a blind location in isolation.
Study the property first.
Understand:
- Where deer bed
- Where they feed
- Where they drink
- How they travel
- Which trails they use
- Where terrain concentrates movement
- How wind affects scent
- How you will enter and exit
- Where your shooting lanes will be
- How your blind will blend into the environment
Then position your bow hunting blind around those factors.
For bowhunting, small details matter. A few yards can change a shooting angle. A different window orientation can change your ability to draw. An access route can determine whether deer reach your hunting area undisturbed. A wind shift can make one location more suitable than another.
Take the time to scout, map, test, and adjust your setup before relying on it during the season.
When you’re ready to build the setup around the right equipment, explore Hunting Blind Supply’s bow hunting blinds and deer hunting blinds and choose a blind that matches your property’s terrain, hunting style, shooting requirements, and placement strategy.
Shop Hunting Blind Supply for bow hunting blinds and deer hunting blinds designed with practical hunting conditions in mind.




One thought on “Best Bow Hunting Blind Placement Tips | Complete Guide to Choosing the Right Location”