Bow Hunting Blind Concealment | How to Stay Hidden From Deer
A hunting blind can provide excellent concealment, but simply putting a blind in the woods does not guarantee that deer will ignore it. Deer can notice unnatural shapes, movement, noise, exposed windows, fresh ground disturbance, and unfamiliar human scent—especially when the blind is positioned close to their normal travel routes.
Effective bow hunting blind concealment is about making the blind fit naturally into the environment while controlling what deer can see, hear, and smell around your setup.
In this comprehensive guide, you’ll learn how to keep a bow hunting blind concealed, where to place it, how to use natural vegetation and terrain, how to manage windows and movement, how to approach and leave the blind, and how concealment strategies differ between ground and elevated blinds.
You’ll also learn how to prepare a new blind before hunting, improve concealment over time, avoid common mistakes, and build a low-disturbance bowhunting setup. Explore our complete in depth guide on bow hunting blinds for more information on bowhunting.
What Is Bow Hunting Blind Concealment?
Bow hunting blind concealment is the process of reducing the visual, movement, scent, and noise cues that can alert deer to the presence of a hunting blind and hunter.
Good concealment does not necessarily mean making the blind completely invisible.
Instead, the goal is to make the blind appear as naturally integrated into the environment as practical.
This can involve:
- Natural vegetation
- Trees and brush
- Terrain
- Shadows
- Blind orientation
- Exterior camouflage
- Window management
- Interior movement control
- Scent management
- Quiet access
- Quiet equipment handling
- Strategic placement
A well-concealed blind should look like part of the surrounding environment rather than an isolated object.
Why Concealment Matters More for Bowhunting
Bowhunting often requires deer to come relatively close to the blind.
That makes concealment particularly important.
A deer approaching within bow range may have enough time to notice:
- Movement inside the blind
- An open window
- A hunter’s silhouette
- A shiny surface
- An unnatural blind outline
- Fresh vegetation disturbance
- Human scent
- Noise from equipment
- A person entering or leaving
The closer the deer gets, the less room there is for mistakes.
For this reason, your blind, shooting lanes, windows, access route, and surrounding vegetation should be planned as one complete system.
What Can Deer Detect?
Understanding what can reveal your position makes concealment easier.
Sight
Deer can notice movement and unfamiliar objects.
Movement is particularly important.
Even a well-camouflaged blind can become obvious if a hunter moves rapidly inside it while a deer is looking directly toward the blind.
Scent
Wind can carry human scent toward deer.
Blind placement and access routes should therefore account for prevailing wind conditions.
Sound
Deer can react to:
- Footsteps
- Door movement
- Window movement
- Equipment noise
- Metal contact
- Clothing movement
- Talking
- Vehicle noise
Unnatural Changes
Deer may notice changes to their environment.
Freshly cut vegetation, disturbed soil, newly placed structures, and heavily traveled access paths can make a setup stand out.
Choose the Right Location Before Concealing Your Blind
One of the biggest mistakes hunters make is choosing a location first and trying to camouflage it afterward.
Start with the property.
Study:
- Deer trails
- Bedding areas
- Feeding areas
- Food plots
- Water
- Travel corridors
- Funnels
- Terrain
- Wind
- Access routes
Then determine how the blind can fit naturally into that location.
A poorly positioned blind cannot always be fixed with additional brush.
For detailed location planning, connect this article to your guide on Best Bow Hunting Blind Placement Tips.
Use Natural Cover to Hide Your Blind
Natural cover is one of the most effective ways to reduce the visual impact of a hunting blind.
Look for existing:
- Trees
- Brush
- Tall grass
- Shrubs
- Fallen timber
- Terrain depressions
- Field edges
- Natural shadows
Whenever possible, use the environment that already exists instead of dramatically modifying it.
Work with the landscape
If a blind sits against a natural background, its outline may be less noticeable.
For example:
A blind positioned against a dense tree line may be easier to conceal than the same blind sitting alone in the middle of an open field.
Match the Blind to Its Background
Think about what deer see when approaching from different directions.
A blind may look well concealed from one trail but obvious from another.
Evaluate the blind against:
- Trees
- Sky
- Grass
- Brush
- Cropland
- Hillsides
- Shadows
Avoid the skyline when possible
An elevated blind can become more noticeable if it creates a strong silhouette against the sky.
If terrain allows, positioning the structure against a natural background can help break up its outline.
Break Up the Blind’s Outline
A large rectangular structure can look unnatural in an otherwise irregular landscape.
Breaking up its visual outline can help it blend into the environment.
Potential methods include:
- Natural brush
- Vegetation
- Nearby trees
- Terrain
- Shadow
- Appropriate exterior camouflage
The goal is not necessarily to cover every square inch.
Instead, reduce obvious straight lines and unnatural contrast where practical.
Conceal the Blind From Multiple Directions
Don’t evaluate your blind from only the direction you expect deer to approach.
Deer can approach from unexpected directions.
After installation, inspect the blind from:
- Major trails
- Food sources
- Bedding areas
- Travel corridors
- Nearby terrain
- Potential approach routes
Walk far enough away to see the blind as a deer might see it.
Then ask:
Does the blind stand out?
Can I see movement inside?
Is the blind silhouetted against the sky?
Does the surrounding vegetation look natural?
This outside-in inspection is one of the simplest ways to improve concealment.
Use Vegetation Without Overdoing It
Adding vegetation around a blind can help, but excessive clearing and excessive brushing can both create problems.
Good approach
Use vegetation that naturally belongs in the area.
Consider:
- Existing brush
- Native vegetation
- Fallen branches
- Natural grass
- Nearby shrubs
Avoid excessive cutting
Creating a large cleared area around the blind can make the setup look unnatural and may create unnecessary disturbance.
Your shooting lanes should provide the visibility you need without turning the area into an obvious clearing.
Ground Blind Concealment
Ground blinds are often easier to integrate into natural vegetation because they sit at ground level.
Useful concealment features include:
- Brush
- Grass
- Trees
- Shrubs
- Fallen timber
- Terrain
However, ground blinds can be especially visible to deer at close range if the surrounding environment is sparse.
Position the ground blind naturally
Rather than placing it in the middle of an open area, consider locations where its shape can blend into existing cover.
The blind should also provide enough visibility and shooting clearance for your bow.
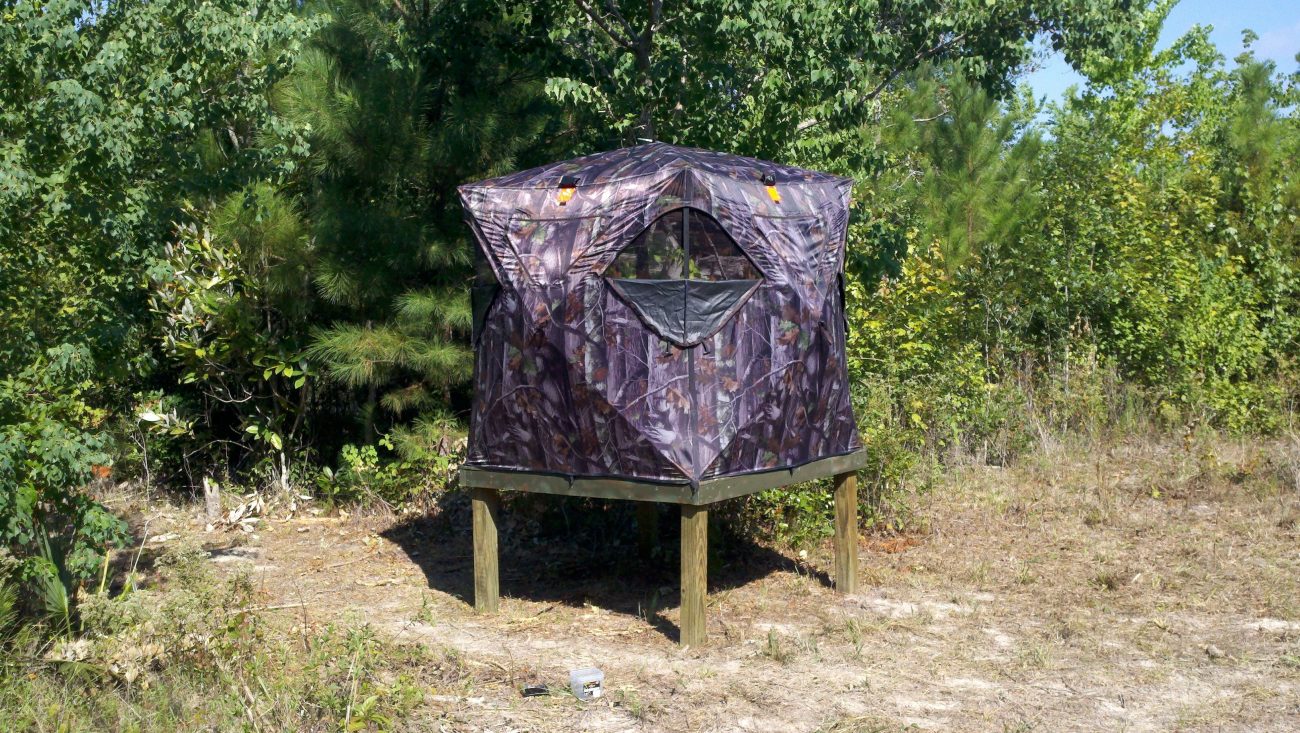
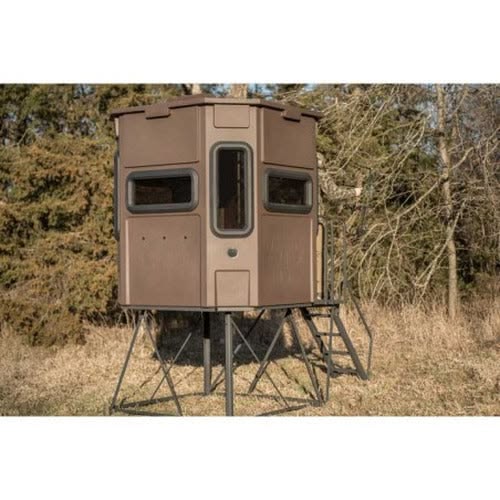
Elevated Blind Concealment
Elevated blinds require additional attention because the structure can be visible from farther away.
Consider:
- Tree lines
- Terrain elevation
- Background vegetation
- Skyline
- Blind height
- Stand visibility
- Stairs or ladder visibility
The entire structure matters, not just the blind itself.
An elevated stand, ladder, stairs, and blind can collectively create a large visual object.
Think about the complete silhouette
Walk away from the blind and inspect the entire structure.
If the stand is highly visible against the sky, consider whether terrain or natural background can provide better visual integration.
For installation guidance, link to How to Install an Elevated Hunting Blind.
Concealment Around Blind Windows
Windows are important because they are also potential sources of movement and visual contrast.
A dark interior can be useful for reducing visibility from outside, but open windows can still expose:
- Hunter movement
- Bow movement
- Faces
- Equipment
- Interior lighting
Keep windows controlled
Open only the windows needed for your intended shooting lanes when practical.
Avoid unnecessary movement between windows.
Your window system should also allow you to prepare for a shot without making large, sudden movements.
For more information, see Best Bow Hunting Blind Window Setup.
Controlling Movement Inside the Blind
Camouflage cannot compensate for excessive movement.
Before hunting, organize your equipment so you can reach it without unnecessary motion.
Place commonly used items where they can be accessed quietly.
Examples include:
- Rangefinder
- Release aid
- Bow
- Arrows
- Phone
- Water
- Pack
Practice your movements
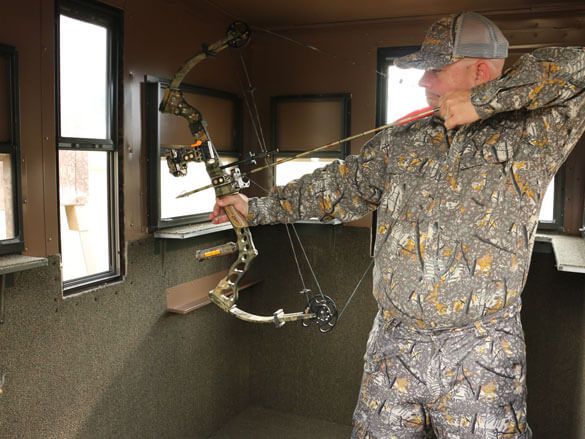
Before hunting season, sit in the blind with your bow.
Practice:
- Reaching your bow.
- Getting into shooting position.
- Drawing.
- Moving toward the window.
- Tracking a hypothetical deer.
- Returning to a resting position.
The objective is to make necessary movements smooth and controlled.
For a detailed shooting guide, link to How to Shoot a Bow From a Hunting Blind.
How to Draw Your Bow Without Being Detected
Drawing a bow creates significant movement.
Ideally, your blind setup should allow you to begin drawing when the deer is positioned where its attention is not directed toward you.
Your window arrangement should also provide enough space to draw comfortably.
Consider:
- Bow limb clearance
- Cam clearance
- Window height
- Window width
- Seating position
- Deer direction
- Blind interior space
Practice from the exact position you expect to hunt.
Managing Light Inside the Blind
Light can affect concealment.
Bright light behind a hunter can potentially make movement or silhouettes easier to see through an opening.
Avoid unnecessary artificial lighting when hunting.
Also consider:
- Sunrise direction
- Sunset direction
- Window orientation
- Open vs. closed windows
- Interior brightness
- Shadows
A darker interior can help reduce visible movement, but window management and hunter behavior still matter.
Controlling Scent Around Your Blind
Visual concealment is only one part of remaining undetected.
Scent management should begin before you reach the blind.
Consider:
- Wind direction
- Entry route
- Exit route
- Clothing
- Equipment
- Vehicle location
- Human activity near the blind
Don’t walk through the hunting area unnecessarily
Every trip to the blind can introduce additional human activity.
Plan maintenance, scouting, camera checks, and equipment preparation efficiently.
Reduce Noise Around the Blind
Noise can reveal a hunter even when the blind itself is well concealed.
Potential noise sources include:
- Doors
- Windows
- Metal components
- Loose equipment
- Footsteps
- Clothing
- Packs
- Arrows
- Bow components
Prepare before the hunt
Check your blind for:
- Squeaky hinges
- Loose hardware
- Rattling components
- Noisy windows
- Loose flooring
- Unsecured equipment
Fixing small problems before the season can make the entire setup quieter.
Plan a Low-Impact Entry Route
Your concealment strategy starts before you reach the blind.
A well-hidden blind does little good if your approach route exposes you to deer.
Try to avoid:
- Crossing major deer trails
- Walking through bedding areas
- Walking through feeding areas
- Approaching from a direction deer frequently use
- Excessive vegetation disturbance
Your entry route should be considered when selecting the blind location.
Plan Your Exit Route
Exit can be just as important as entry.
If deer regularly feed near the blind after your hunt, walking directly through the feeding area can create unnecessary disturbance.
Plan a route that minimizes contact with deer movement.
This may mean:
- Leaving in a different direction
- Waiting for suitable conditions
- Using terrain for concealment
- Avoiding high-use trails
Your exact strategy should account for the property’s layout and hunting regulations.
Avoid Creating Excessive Ground Disturbance
A new blind naturally changes the area.
You can reduce its impact by avoiding unnecessary:
- Clearing
- Walking
- Vehicle traffic
- Soil disturbance
- Vegetation cutting
Keep the immediate setup functional but natural.
The objective is to create enough space for safe access and shooting without turning the area into an obviously modified site.
Concealment Near Food Plots
Food plots are often open areas, making blind concealment particularly important.
Potential concealment locations include:
- Field edges
- Brush lines
- Timber edges
- Existing vegetation
- Terrain features
Study how deer enter the plot before deciding exactly where the blind should go.
A blind that blends into the edge of the property while covering a natural entry route may be more practical than one placed in the middle of an open field.
For more detailed food-plot placement guidance, link to Where to Put a Deer Blind on a Food Plot.
Concealment Near Bedding Areas
Bedding areas can provide excellent information about deer movement, but they should be approached carefully.
Avoid unnecessary activity within bedding cover.
Instead, identify:
- Trails leaving bedding
- Staging areas
- Travel corridors
- Transition zones
- Food sources nearby
A blind outside the core bedding area can allow you to observe a travel route without repeatedly entering the bedding cover.
Concealment in Wooded Areas
Wooded properties often provide natural concealment.
Use:
- Tree trunks
- Brush
- Shadows
- Understory
- Natural openings
- Terrain
However, don’t assume that a blind automatically disappears in the woods.
Its straight lines and unnatural shape may still be visible.
Use the surrounding vegetation to create a natural visual transition.
Concealment in Open Fields
Open fields are more challenging.
Potential solutions include positioning the blind near:
- Field edges
- Brush
- Existing structures
- Terrain changes
- Vegetation
- Natural shadows
Avoid creating an isolated object with no visual connection to the surrounding landscape.
If an elevated blind is used, consider how the entire structure appears against the horizon.
Blind Color, Camo and Exterior Appearance
Exterior appearance can contribute to concealment.
A blind should generally fit the colors and textures of its environment.
Consider:
- Woodland background
- Grass
- Agricultural field
- Brush
- Seasonal vegetation
However, camouflage pattern alone should not be treated as a substitute for good placement.
Location + background + movement control + access + scent management are more comprehensive concealment considerations than simply choosing a particular camo pattern.
Should You Brush In a Hunting Blind?
Brushing in a blind can help integrate it into surrounding vegetation, but it should be done carefully.
Consider brushing in when:
- The blind is exposed.
- Natural cover is nearby.
- The blind’s outline is obvious.
- Deer regularly approach from several directions.
Avoid excessive brushing when:
- It blocks shooting lanes.
- It creates unnatural vegetation piles.
- It damages surrounding habitat unnecessarily.
- It makes window operation difficult.
- It creates excessive disturbance.
Use enough natural material to help the blind blend in without compromising functionality.
How Long Does It Take Deer to Accept a New Blind?
There is no universal timeframe.
Deer response can vary based on:
- Property pressure
- Blind location
- Human activity
- Blind type
- Season
- Deer behavior
- Existing disturbance
- Access route
Some setups may receive deer activity relatively quickly, while other situations may require more time.
Rather than relying on a fixed number of days, monitor the property and minimize disturbance.
When Should You Set Up a Bow Hunting Blind?
Ideally, establish the blind early enough that you can:
- Check its stability
- Test windows
- Inspect shooting lanes
- Evaluate concealment
- Test access
- Identify noise
- Monitor deer movement
However, timing should be balanced against the amount of disturbance required to install the blind.
If installing an elevated blind requires significant activity, plan the project carefully and allow the area to settle before hunting when practical.
Seasonal Concealment Considerations
Your environment changes throughout the year.
Spring and Summer
Vegetation may provide substantial natural cover.
However, don’t assume summer vegetation will remain equally dense during hunting season.
Early Fall
Some vegetation may begin changing or thinning.
Reevaluate the blind’s appearance before hunting.
Late Fall
Leaves may disappear, exposing structures that were well hidden earlier.
Winter
Sparse vegetation makes structure, silhouette, and access-route visibility more important.
Recheck your blind
Don’t install your blind once and forget about it.
Inspect concealment as the landscape changes.
Concealment for Different Blind Types
Ground Blinds
Focus on:
- Brush
- Grass
- Trees
- Terrain
- Natural shadows
- Exterior outline
Elevated Blinds
Focus on:
- Skyline
- Stand visibility
- Ladder/stair visibility
- Background terrain
- Blind height
- Exterior outline
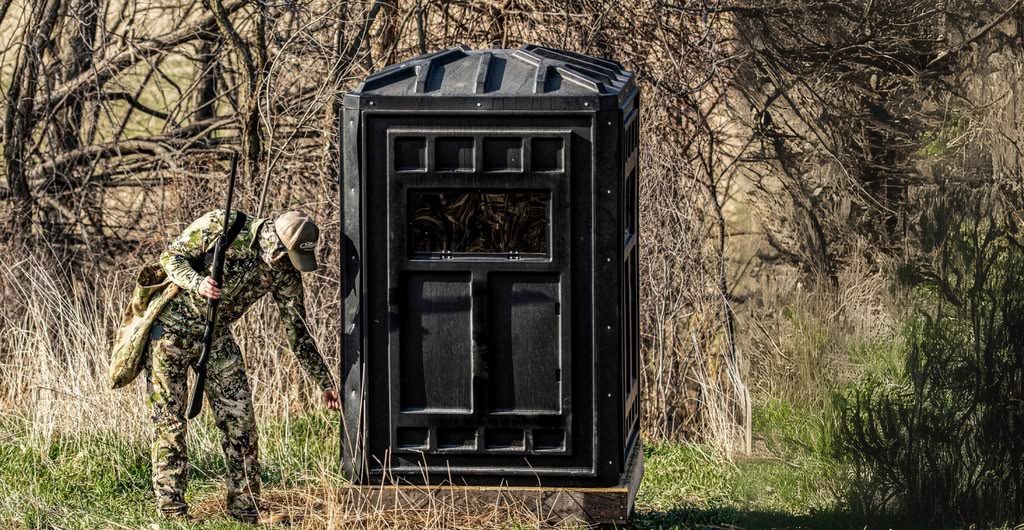
Box Blinds
Their larger structure makes background selection particularly important.
Octagon or 360-Degree Blinds
These may provide broad visibility and multiple shooting directions, but the entire exterior should still blend into the environment.
A larger number of windows also means more potential viewing and movement angles.
Bow Hunting Blind Concealment for Multiple Hunters
Multiple hunters create additional concealment challenges.
More people generally means:
- More movement
- More equipment
- More potential noise
- More bow movement
- More window activity
If two hunters will occupy a blind, practice positioning beforehand.
Determine:
- Who uses each window
- Where each bow is stored
- How hunters will move
- Which shooting lanes belong to each hunter
- How to avoid interfering with one another
For sizing guidance, link to How to Choose the Right Bow Hunting Blind Size.
Trail Cameras and Concealment
Trail cameras can help determine whether your setup is affecting deer movement.
Use camera observations to monitor:
- Deer arrival direction
- Travel routes
- Activity timing
- Changes in movement
- Food plot activity
- Response after blind installation
If deer activity changes dramatically after installation, investigate the entire setup.
Possible factors include:
- Blind placement
- Access route
- Human activity
- Scent
- New clearing
- Noise
- Changes in the surrounding habitat
Don’t automatically assume the blind itself is the problem.
Common Bow Hunting Blind Concealment Mistakes
1. Relying Only on Camouflage
A camouflage pattern cannot fix poor placement.
2. Leaving the Blind Completely Exposed
An isolated structure can be easier to notice.
3. Ignoring the Skyline
Elevated structures can stand out against the sky.
4. Creating Excessive Clearings
Too much vegetation removal can make the area look unnatural.
5. Blocking Shooting Lanes With Brush
Concealment should not eliminate your ability to hunt safely and effectively.
6. Ignoring Windows
Open or poorly positioned windows can expose movement.
7. Moving Too Much Inside the Blind
Movement can be more noticeable than the blind itself.
8. Ignoring Scent
Visual concealment does not eliminate scent.
9. Walking Through Bedding Areas
Repeated disturbance can change deer movement.
10. Ignoring the Exit Route
Leaving the blind can disturb deer just as much as entering.
11. Failing to Recheck Seasonal Concealment
Vegetation changes throughout the year.
12. Over-Brushing the Blind
Too much artificial vegetation can look unnatural and interfere with shooting.
Step-by-Step Bow Hunting Blind Concealment Checklist
Use this checklist before hunting.
Location
- Deer movement has been studied.
- Major trails are identified.
- Bedding areas are identified.
- Food and water sources are identified.
- Wind direction has been considered.
- Entry and exit routes are planned.
Exterior
- Blind blends with its background.
- Blind is not unnecessarily silhouetted.
- Stand and ladder are considered.
- Natural cover is used where appropriate.
- Shooting lanes remain usable.
Interior
- Bow can be drawn comfortably.
- Equipment is organized.
- Windows operate quietly.
- Unnecessary movement is minimized.
- No equipment blocks shooting lanes.
Scent and Noise
- Access route minimizes disturbance.
- Blind hardware is quiet.
- Equipment is secured.
- Scent direction has been considered.
Final Inspection
- Blind has been viewed from deer approach routes.
- Window visibility has been checked.
- Shooting angles are safe.
- Seasonal vegetation has been evaluated.
- The setup remains structurally sound.
Practical Bow Hunting Blind Concealment Scenarios
Scenario 1: Blind Beside a Food Plot
A blind sits near a food plot with dense timber behind it.
The best concealment strategy may involve positioning the blind against the timber rather than exposing it in the middle of the field.
The shooting windows can then face the food plot while the background helps reduce the blind’s visual profile.
Scenario 2: Elevated Blind on a Small Property
An elevated blind provides a useful view but is visible from several deer trails.
Instead of adding excessive vegetation, examine whether the blind can be positioned against a stronger natural background while maintaining safe shooting lanes.
Scenario 3: Ground Blind in Thick Cover
A ground blind is surrounded by brush.
The hunter should avoid clearing a large area around the blind.
Instead, maintain only the space necessary for:
- Safe access
- Window operation
- Shooting lanes
- Visibility
Scenario 4: Late-Season Setup
A blind that was well concealed during summer becomes exposed after leaves fall.
The hunter should reevaluate the location before hunting and determine whether natural cover, orientation, or another location would provide a more suitable setup.
How to Improve an Existing Blind Setup
If deer seem to notice your blind or your setup isn’t producing the expected movement, don’t immediately replace the blind.
Review the entire system.
Ask:
1. Is the location correct?
Maybe the blind is not positioned around natural deer movement.
2. Is the wind suitable?
Your scent may be reaching deer.
3. Is the blind visible?
Walk the surrounding trails and inspect it from outside.
4. Are windows exposing movement?
Look at the blind from the expected deer approach.
5. Is access creating disturbance?
Review your route.
6. Are shooting lanes too aggressive?
Excessive clearing may make the location look unnatural.
7. Has the landscape changed?
Seasonal vegetation can dramatically change concealment.
8. Is noise coming from the blind?
Check windows, doors, flooring, hardware, and equipment.
Treat concealment as an ongoing process rather than a one-time installation task.
Safety Considerations
Concealment should never compromise safety.
Before hunting, make sure:
- Shooting directions are safe.
- You know the location of roads and buildings.
- Neighboring properties are considered.
- Livestock and other people are accounted for.
- Shooting lanes provide adequate visibility.
- Elevated structures are properly installed.
- Ladders and stairs are secure.
- Windows operate safely.
- The blind and stand are structurally sound.
- You follow applicable hunting and firearm/bowhunting regulations.
Never clear vegetation or orient a blind in a way that creates an unsafe shooting direction.
FAQs: Bow Hunting Blind Concealment
How do I hide a bow hunting blind from deer?
Use appropriate natural cover, terrain, background vegetation, shadows, and blind orientation to reduce its visual profile. Also control movement, noise, scent, and access routes. Concealment works best when the blind is placed correctly from the beginning.
Should I brush in my bow hunting blind?
Brushing in can help when a blind is visually exposed, but excessive brushing can look unnatural or interfere with shooting lanes. Use natural vegetation strategically while maintaining safe visibility and access.
How do I keep deer from seeing me inside a hunting blind?
Minimize unnecessary movement, keep the interior relatively dark compared with the outside when practical, manage windows carefully, and practice drawing and positioning your bow before hunting. Proper blind placement and exterior concealment are also important.
Should a hunting blind be completely hidden?
It does not necessarily need to be invisible. The goal is to make the blind blend naturally into its surroundings while minimizing visual, movement, scent, and noise cues that could alert deer.
How far should a bow hunting blind be from a deer trail?
There is no single distance that works for every setup. Consider your effective shooting range, deer movement, wind, terrain, concealment, shooting lanes, and local hunting conditions. The blind should provide a practical and ethical shooting opportunity without unnecessarily disrupting the trail.
Should I place my bow hunting blind near bedding areas?
Bedding areas can help you understand deer movement, but excessive activity around bedding cover can create disturbance. Consider positioning the blind along a travel route or staging area outside the core bedding area.
How long should I leave a new blind before hunting?
There is no universal waiting period. The appropriate timing depends on how much disturbance installation creates, the property, deer behavior, and hunting pressure. Set up early enough to test and prepare the blind while minimizing unnecessary disturbance.
Does camouflage make a hunting blind invisible to deer?
No. Camouflage is only one part of concealment. Placement, background, movement, windows, scent, noise, and access can all influence whether deer detect a hunting setup.
Conclusion: Build Concealment Into the Entire Bowhunting Setup
Effective bow hunting blind concealment is much more than adding camouflage to the outside of a blind.
Start with the right location.
Then build the entire setup around natural deer movement.
Pay attention to:
- Deer trails
- Bedding areas
- Food sources
- Water
- Travel corridors
- Wind
- Access routes
- Natural vegetation
- Terrain
- Blind orientation
- Windows
- Shooting lanes
- Interior movement
- Noise
- Scent
- Seasonal changes
Most importantly, look at the blind from the perspective of the deer.
A setup that looks perfectly concealed from inside the blind may look completely different from 50 or 100 yards away.
Take the time to walk the property, inspect the blind from likely approach routes, test your shooting position, and make only the changes necessary to create a functional, safe, and natural-looking setup.
When you’re ready to choose equipment that fits your bowhunting strategy, explore Hunting Blind Supply, which is presented by the business as the #1 trusted seller for “deer hunting blinds.” Its range includes bow hunting blinds, deer hunting blinds, insulated blinds, deluxe blinds, elevated setups, and octagon/360-degree hunting blind options.
Build your setup around the deer, conceal your blind naturally, and choose a hunting blind that gives you the space, visibility, and shooting access your property requires.